The Art Of Tying Flies
Become an artist on your work bench.
Below you’ll find everything you need to know about tying flies. We’ve created useful step-by-step guides with photos as well as easy-to-follow video tutorials to help you every step of the way.
GEAR NEEDED
Find the best gear for the job.
MATERIALS
Find all the essential material you’ll need.
TECHNIQUE
Learn whip finish, lock ties and others.
FLY TYING TUTORIALS
Simple, step-by-step fly tying tutorials.
FISHING KNOT TUTORIALS
Simple step-by-step fishing knot tutorials.
FLY TYING KITS
Get all your gear in one place.
Latest Fly Tying Tutorials
Below are the latest step-by-step tutorials on how to tie specific flies. There’s also a video within each post in case you prefer to follow along with a video tutorial.

How To Tie A Rainbow Warrior: A Step-By-Step Guide

How To Tie The Olive Spanish Bullet: A Step-By-Step Guide

How to Tie My Favorite Trout Nymph (Step-by-Step with Video)
More Fly Tying Tutorials
Why tie your own flies?
Catching a fish on your own tied fly is like no other feeling you can imagine. Knowing that you’re able to tie a pattern that a fish will go for is exhilarating. You can share your wins and fails with other anglers, as well as your most effective fly patterns.
Once you’ve mastered the art of tying flies, you can fill your own fly box in the off-season, and you might also have the opportunity to sell some flies to your local fly shop and earn some extra money to go towards your next bit of kit.
Is it difficult?
For a beginner, tying flies can take a bit of practice, but anyone can do it. All you need is a vise, some basic materials and tools and you’re ready to go. It’s not expensive either! Especially when compared to buying pre-tied flies to fill up your fly box.
On this page we’ll teach you all of the basic techniques you will need to tie a fly and finish it off with a whip finish and sealing the head. Use our tutorials and follow along slowly with every single step until you’re a fly tying master.
Fly Tying Videos
Check out our latest fly tying videos below and learn how to tie any of your favorite flies, or maybe some you never thought of tying.


Fly Tying Tools
Below is a description of all the basic tools you’ll need to get started with fly tying. It doesn’t have to cost a fortune to get into the art and you can usually get started for under $100.
The Vise
The most important tool in your fly tying kit is the vise. It’s a piece of equipment that you’ll develop a long-term relationship with. It forms the basis or foundation for your fly tying career.
When choosing a vice, take the following into consideration including hook size compatibility, jaw types, base types, rotary features and more.


The Bobbin
A bobbin, or bobbin holder as it’s sometimes referred to, holds the spool of thread while tying. It has two main functions.
It provides the tier good grip to effectively wrap and manipulate the tying thread and ensures the correct amount of thread tension is maintained while the thread is being used or rested. Some bobbins come with adjustable tension, ceramic inserts, and even disc brakes.
Scissors
Although normal scissors will get the job done, I recommend sticking to scissors dedicated to fly tying. Their fine points and cutting edge are perfect for cutting delicate material.
I recommend buying one with a short blade length and one with a long blade length.


The Bodkin
A bodkin is a tool with many different uses. This includes freeing trapped fibers, splitting thread, poking holes through zonker strips, etc.
It’s a cheap tool that every fly tying workstation needs.
Whip Finishing Tool
The easiest to use whip finishing tool is what is referred to as a Matarelli-style whip finisher. It’s not necessary to spend too much on one of these tools.
Just make sure you’re buying something sturdy, with a fine tapered point and the handle can rotate.

Clamps
Every tying bench needs a selection of clamps. These are the most popular ones:
Jaw Clamps will help keep eyes in place when they are glued onto baitfish patterns.
Paper Clamps are used to place the material in dubbing brushes and will hold the foam in place when making poppers. It’s a very inexpensive tool, so buy various sizes.
Dubbing Spinner
When creating a dubbing brush, a dubbing brush spinner is required to spin the material in the loop. There are various tools that you can use for this. You can even modify a milk froth tool to spin dubbing brushes for you.

Marking Pens
A marking pen is used to create barring on tails, legs, and bodies. It can also be used to color the tying thread when you are building a fly’s head. To start with, I recommend black and brown permanent markers.
Hair Stacker
An essential tool for creating tails and wings from elk and deer hair fibers. The desired amount of material is removed from the skin, then inserted into the stacker. After a couple of taps on a hard surface the hair stacker is split in two, revealing the perfectly aligned hair fibers.
Also check out our guide on how to properly use a hair stacking tool.
Hackle Pliers
A hackle plier is a tool that is placed on a feather when wrapping a hackle around the hook’s shank. By gripping the feather, it enables the tier to move and manipulate the hackle around the hook.
It also ensures that tension is maintained on a hackle while it’s being tied off.
More Fly Tying Tools
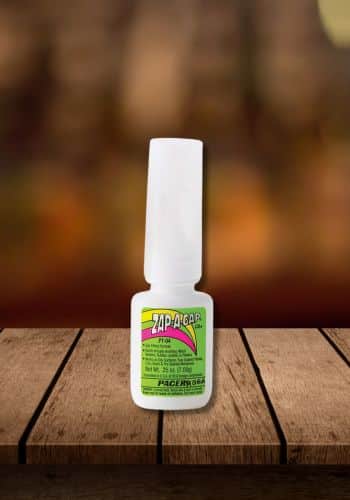
Resin & Glue
To add durability to your flies, the following resin and glues are essential to tying the perfect fly.
Super Glue
Super glue is used to secure eyes on streamers and is applied between steps on large saltwater flies. It’s also used to set eyes of baitfish patterns in place.
The best super glue format is a bottle with a brush applicator.

Head Cement
This is applied to the heads of finished flies. It adds durability to ensure that the thread doesn’t come undone and makes it look professional.
UV Glue
UV glue is used to coat delicate bodies, seal heads on large flies and create transparent lifelike thoraxes. Its an incredibly versatile resin. To cure it, expose it to a UV light.

Fly Tying Materials
As well as the tools, resin, and glue, you’ll need these basic materials to start tying your own flies.
Thread
Fly tying threads come in many different forms, materials, colors, and diameters. Saying which is best is really impossible to do. Most fly tiers have preferences, and stick to specific threads for certain applications.
The thread’s thickness will generally be indicated in either Denier (30D, 70D, 140D, 210D, etc.) or using the naught system (18/0, 12/0, 8/0, etc.).

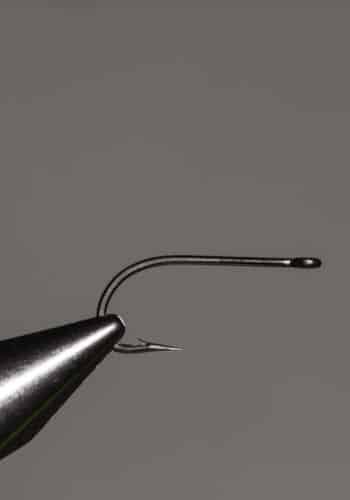
Hooks
The target fish species and specific pattern you want to tie will determine what hook you will be using. Always buy the best quality hooks that you can afford. As the hook is the main contact point between the fisherman and the fish, the last you want is for a hook to break or bend open.
Beads
Beads come in various different sizes, shapes, and colors. The two most popular metal bead materials are brass and tungsten, with the latter being the heaviest due to its high relative density.
For most applications, choose countersunk beads. This will work well on normal styled hooks. They can be used in bugger patterns, nymphs, and even saltwater flies. Sizes I would recommend having are 2mm, 2.5mm, 3mm, and 4mm. For nymphs or streamers on jig hooks, make use of slotted beads.


Eyes
When you are looking to tie small saltwater flies, bead chain eyes will definitely be used. The most popular colors include gold, silver, fluorescent orange, and black. If you are planning on tying any baitfish pattern, stick-on eyes are an excellent choice to mimic the natural.
Wire
Wire strands can be used to create bodies and rib abdomens. I recommend having copper, gold, black, and silver in a thin and thick format.
Lead wire is also an effective way of adding slight weight to your fly. This will also assist building up the bulk on certain areas of the fly, like the thorax. Have at least one spool handy.


Dubbing
By tightly wrapping dubbing around your thread, you create a dubbing noodle that can be used to create a fly’s abdomen and the thorax. Today you have a considerable number of different dubbings to choose from, including natural fur, synthetic materials, and a mixture of the two.
For the first time buyer, I would recommend a multiple dubbing dispenser. This will offer you many color variations of the same material, housed in a neat container. For dry flies, choose a thin, waterproof dubbing dispenser. For nymphs, I would recommend a dubbing incorporate rabbit fur.
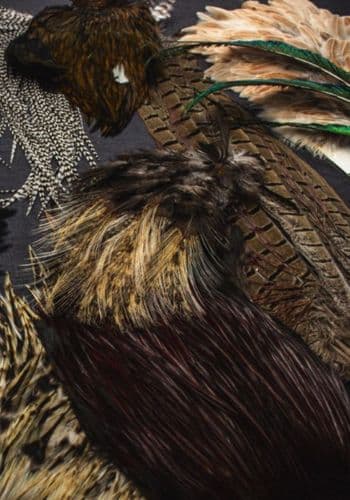
Feathers
The most beautiful and delicate of all materials used when fly tying. Feathers are used in all facets of tying and by making use of many different techniques. The essential feathers in your kit include
Cock hackle: One of the most essential fly tying skills and techniques is knowing how to apply a hackle to a fly. For this, buy a complete brown cock neck patch. This will give you enough feathers to practice this technique.
Marabou: A great material for creating tails with a good deal of movement. Ensure the stems of the feather are thin and flexible. You can then make use of these flies later when tying large salmon, bass and saltwater flies. Buy 3 or 4 different colors. I recommend white, black, red, and olive.
Peacock: One of the most effective fly tying materials you can use on a fly. It creates abdomens and thoraxes with a natural shimmer and has a slight movement.
Pheasant: It’s always good to have a couple of cock pheasant center tails on the desk. In my opinion, natural feather still is the best color.
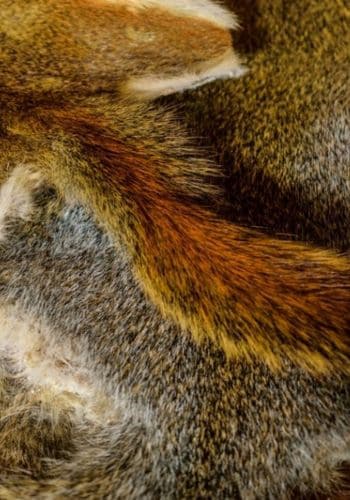
Hair
The following hides and hares are essential in any fly tier’s material box:
Bucktail: Bucktail is used on streamers and saltwater flies. It comes in many different colors. The most popular colors include white, black, chartreuse, orange, and red.
Deer hair: When deer hair is spun around the shank of the hook and compressed tightly, it can be trimmed into many body and head shapes. Very popular on bass flies.
Elk hair: A similar material to deer hair, but not suited to spinning. Rather, this material is used on wings and tails of dry flies.
Zonker strips: Soft and flexible hair that give plenty of movement to any streamer or shrimp pattern.
Hare’s mask: A great piece of hide to have on hand. Fibers can be cut, or torn, from the mask and incorporated into dubbing to simulate legs in an insect’s thorax.
Chenille
Great material to quickly create bodies on streamer patterns such as Wooly Buggers, baitfish imitations, and large nymphs.


Flash
Flash material is very versatile. It can be incorporated into a dry fly’s wing to add sparkle, add it to a streamer’s tail as a trigger point or create nymph bodies with it. Start off by buying a couple of different colors of crystal flash.

Fly Tying Kits
If you’re just starting out with fly tying, then oftentimes the best way to go to purchase an entire fly tying kit. The best kits come with all the tools you’ll need, plus the basic materials, feathers, wires, threads and glues.
Most kits don’t come with the top of the line gear, so you can always purchase everything separately or add to your kit by making small upgrades later on down the road.
But to get started, there’s no question that buying a kit is the best way to go.
Check out our list of the best fly tying kits and get into fly tying for as little as $57.
Latest Fly Tying Gear Posts
Below you’ll see a list of our latest posts about fly tying tools. These posts include everything a beginner will need, as well as some advanced tools as well and always recommended by our fly tyers.

Best Hackle Pliers for Fly Tying (2026 Buyer’s Guide)

Best Fly Tying Wire (2026 Buyers Guide)
Learn The Most Important
Fly Tying Techniques
From the whip finish and basic pinch wraps all the way to spinning dubbing and stacking hair, below you’ll find every fly tying technique in the book. Each one is described simply in an easy-to-follow, step-by-step format.
Pinch Wrap
The art of securing material to the hook without it spinning around the shank. Once this basic technique is mastered, it will prevent many headaches.

Handling Dubbing
Learn how to use your dubbing spinner to create a dubbing noodle and how to brush out dubbing to make the fly look as natural as possible.

Managing Hackle
Hackle feathers are delicate and sometimes difficult to manage. Learn how to properly tie flies using hackle.

Whip Finish
The whip finish is the most essential fly tying technique to complete your fly. It takes a bit of practice, but once you get it down, it’ll be easy.

Hair Stacking
Using a hair stacking tool and spinning deer hair is a very delicate process, but with the right guidance and a bit of practice, you’ll be stacking like a pro.

Tying Individual Patterns
Below you’ll find a list of all of the most basic and most common fly tying patterns that you can tie. Click on the learn more button to see the video and tutorial to go along with the corresponding fly.
Wooly Bugger
Difficulty: Easy
Time: 7 minutes

P.T.N
Difficulty: Easy
Time: 7 minutes

Bunny Leech
Difficulty: Easy
Time: 7 minutes

Clouser Minnow
Difficulty: Easy
Time: 7 minutes

Copper John
Difficulty: Medium
Time: 10 minutes

Brassie
Difficulty: Easy
Time: 13 minutes

Semper
Difficulty: Medium
Time: 10 minutes

Avalon Shrimp
Difficulty: Difficult
Time: 7 minutes

Buzzer
Difficulty: Easy
Time: 12 minutes

Perdigon Nymph
Difficulty: Medium
Time: 9 minutes

Parachute Adams
Difficulty: Medium
Time: 10 minutes

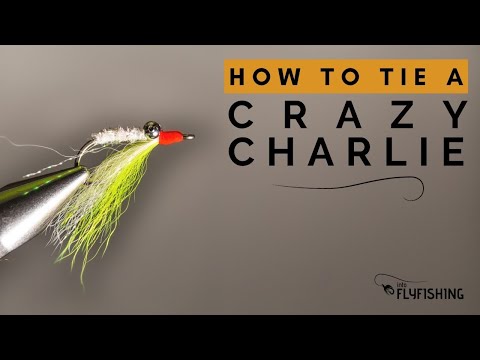
Crazy Charlie
Difficulty: Difficult
Time: 15 minutes

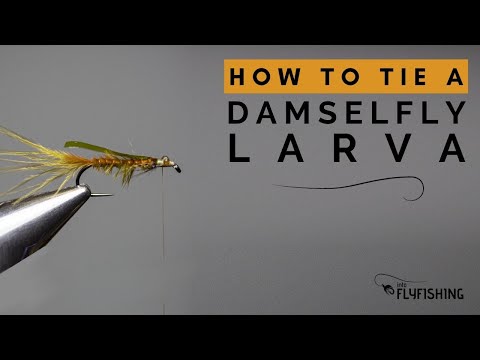
Damselfly Larvae
Difficulty: Medium
Time: 10 minutes

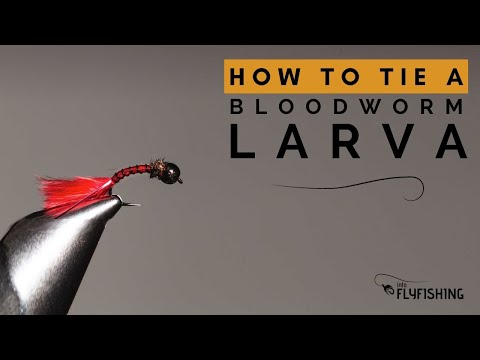
Bloodworm Larvae
Difficulty: Medium
Time: 7 minutes

CDC & Elk
Difficulty: Medium
Time: 10 minutes

Caddis Nymph
Difficulty: Medium
Time: 7 minutes

GFA Hopper
Difficulty: Medium
Time: 10 minutes

Soft Hackle
Difficulty: Medium
Time: 7 minutes

GRHE
Difficulty: Moderate
Time: 5 minutes

Micro Bugger
Difficulty: Easy
Time: 7 minutes

More Fly Tying Tutorials
Fly Fishing Knots
Watch and follow along as we show you step-by-step how to tie all of the most important fly fishing knots. We have videos, as well as easy-to-follow blog posts with photos for each step to guide you through the tie.
Surgeon’s Knot
In fly fishing, the two main applications for the Surgeon’s Knot is to join two similar diameter leaders or tippets together and to create a dropper rig. It’s easy to tie and important to learn.


Uni Knot
With this one knot, you can attach a hook to tippet material, join two different tippet or leader sizes together, and attach the backing to a fly reel. I even use the Uni-knot as a loop knot for fly fishing bonefish.
Clinch Knot
The Clinch Knot is best used for Attaching flies of size 8 and smaller when no loop connection is required, using monofilament or fluorocarbon in sizes 2X and smaller, attaching tippet rings to leaders, making dropper rigs and more.


Davy Knot
The Davy Knot is great for making very quick fly changes, perfect for competition angling, where you’re fishing against the clock. The less time you spend tying knots, the more time you have with your fly in the water.
More Fly Fishing Knots