As an Amazon Associate I earn from qualifying purchases.
In this tying tutorial, we’ll look at how to tie the RS2. If you’re looking for one fly to keep in your fly box that can be used as a dry fly, emerger, or nymph, the RS2 is it.
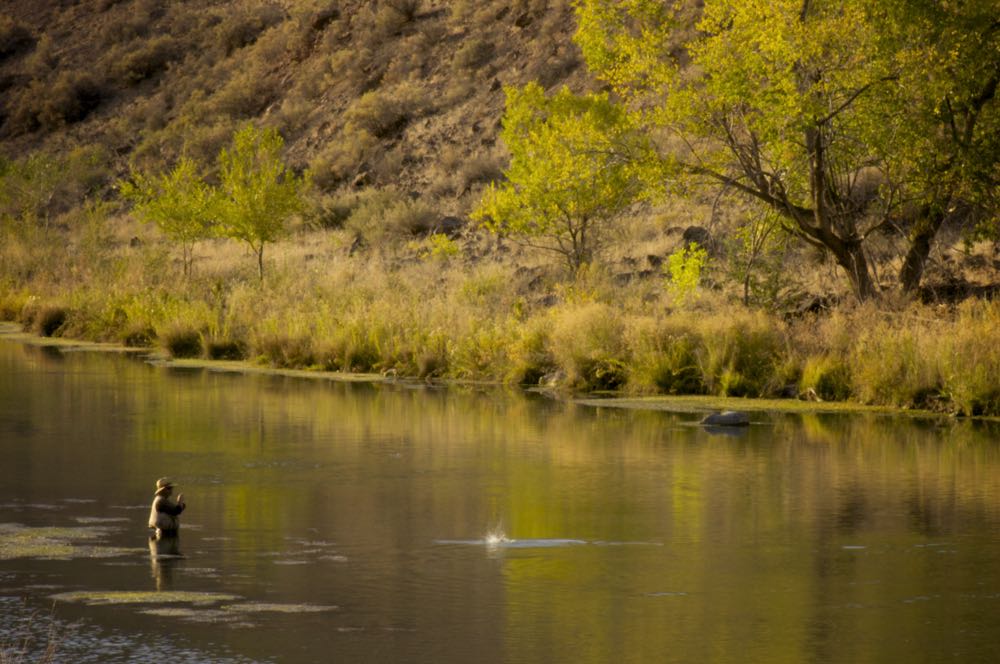
I’ve been using the RS2 fly as an imitation for small black mountain midges here in Cape Town for the last two years and can honestly say it works when most other flies fail.
Quick Look
- Difficulty level: Easy
- Tying time: 3-5 minutes
- Materials: Hook, thread, micro fibbets, fine dubbing, and CDC
- Hook size: 14-22
What is an RS2?
Rim Chung developed the RS2 (Rim’s Semblance #2) over 40 years ago as a generic nymph, emerger, and even dry fly pattern. It also imitates a range of insect species, depending on the size and color you tie it in. The beauty of the RS2 is that with this one fly, you can target fish anywhere in the water column.

If you’d like to learn more about the origin of the RS2, I suggest visiting this site dedicated to the fly.
Watch The How to Tie the RS2 Fly Video

How to Fish an RS2?
The RS2 is designed to be fished in tandem with other flies. As mentioned above, I’ve used the RS2 as a dry fly, an emerger, and even a deep swimming nymph. Let’s look at how you’d rig and fish each scenario.
Dry Fly
As you’ll see when we tie the fly below, the RS2 is a small fly ranging between sizes 16 and 22. The fly also sits pretty low on the water’s surface due to its little CDC wing. For both these reasons, I suggest using the RS2 in conjunction with a larger dry fly.
Attach the RS2 to a piece of 6X or 7X tippet material about 2 feet behind the sighter dry. If you see a rise anywhere close to your main dry fly, set the hook as there’s a good chance the fish ate the RS2.
Emerger
Attach a small piece of tungsten putty or a split shot about 2 feet above the RS2 fly. This will cause it to sink slowly.
Nymph
Attach a heavily weighted nymph below the RS2 and fish the rig as you’d usually fish a nymphing setup. The small size and realistic color and profile of the RS2 make even the weariest of trout eat the fly.
Materials You’ll Need to Tie an RS2
You’ll need the following materials to tie an RS2:

Hook
The RS2 may be tied on a wide range of hooks because it’s fished either as a dry, emerger, or nymph. Keep the sizes in the range between 16 and 22.
For a dry fly version, any small thin wire hook will suffice. Make sure the hook has a thin wire because the fly’s tiny wing cannot support excessive weight.
Nymph and emerger versions of the RS2 may be tied on sturdier hooks as the fly’s meant to be fished sub-surface.
Thread
A thin flat-lying thread is crucial when tying the small RS2. Colors may be varied to suit the overall color of the nymph you’re trying to imitate.

Some of my favorite threads for the RS2 include:
- Griffth’s Sheer 14/0
- Danville’s 70 Denier
- UTC Ultra Thread 70 Denier
- Semperfli Nanosilk 30 Denier
Dubbing
Use a very fine dubbing for both the abdomen and thorax and match the color of both to resemble the natural ones found in your waters.
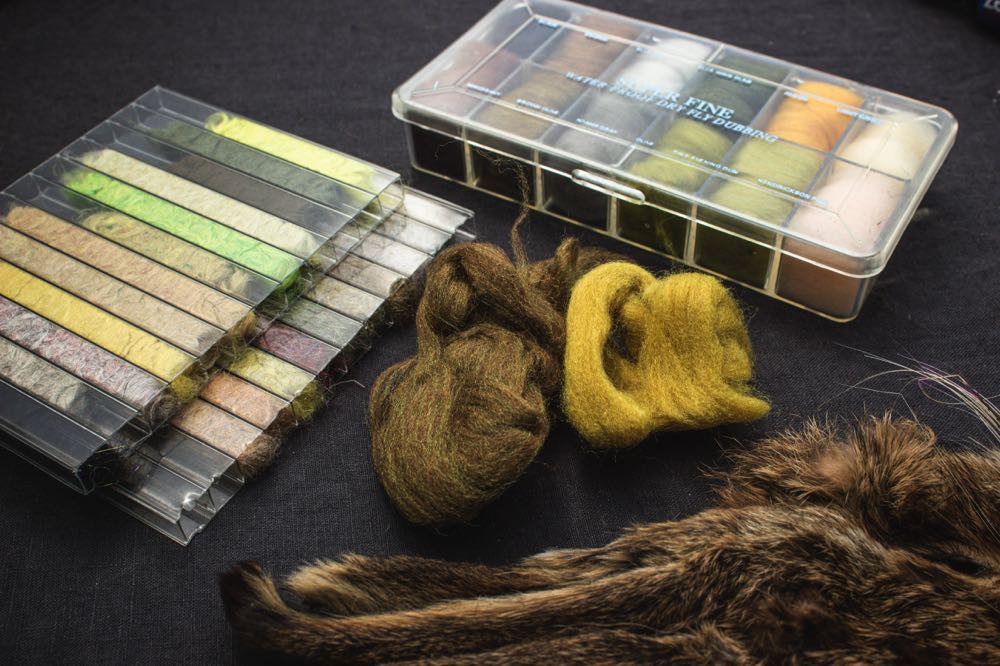
I prefer using a fine dry fly dubbing, but you can use whatever you want.
CDC
The wing on the original RS2 was made from the soft fibers at the base of a hackle feather – almost like micro marabou. However, I do believe that CDC is a superior material for the wing, especially on emerger and dry fly versions.
Make sure you use quality CDC material, as this makes all the difference. The feathers must have thin stems and full, fluffy fibers.
Tools Needed to Tie an RS2
You’ll need the following tools to tie an RS2:

- Vise
- Bobbin holder for the thread
- Scissors
- Whip finishing tool
Step-by-Step Guide to Tie an RS2
So, without further ado, let’s get tying.
RS2 Recipe
I’m tying the RS2 here to imitate a small black mountain midge we find in my local rivers. The specific materials I’m using are:
- Hook: Hanak H130BL #20 dry fly hook
- Thread: Griffith’s Sheer 14/0 olive
- Tail: Two microfibbets strands
- Abdomen: Superfine dubbing blue dun (the color may be varied)
- Wing: Polish CDC white (the color may be varied)
- Thorax: Superfine dubbing black (the color may be varied)
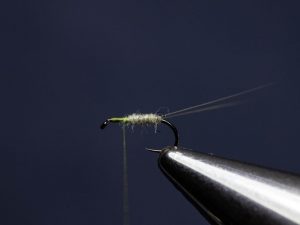
Step 1: Secure the Hook in the Vise
Place the hook between the jaws of the vise. Make sure that the shank is level and that the point and barb are exposed.
Lock the hook in place and test it to make sure it won’t come loose later on.
Step 2: Attach the Thread to the Hook

Hold the end of the thread in your non-tying hand and place the thread over the hook shank with your tying hand, about 1/4 shank-length behind the eye.
Wrap the thread forward six times with touching turns. Then, back the thread over itself, and then lock it in place.
Cut off the excess but do not discard this tag end. Keep it aside for now.
Step 3: Tie In the Tail

Cut two microfibbets fibers and measure them to be about twice as long as the hook shank.
Lay them on top of the hook and secure with thread back to where the hook bend starts.
Cut off the excess fibbet material in the front.
Step 4: Split the Tail

Take the piece of thread you cut off earlier and wrap it around the hook bend, just behind the tail.
Take both sides in your non-tying hand and pass it between the fibbet fibers and on top of the hook shank.
This procedure splays open the fibbets. Secure the thread-piece and cut off the excess.
Step 5: Dub the Abdomen
Create a slender dubbing noodle and make a wrap under the fibbets, which will force them up.
Now, wrap the dubbing noodle forward with touching wraps, adding more dubbing as necessary.
Stop the abdomen when you reach 2/3 of the hook shank.
Step 6: Tie In the Wing

Place two or three CDC feathers against each other, tips aligned. Stroke all the fibers to the tip’s end and tie in the CDC about ½” under the tips (the tips should face rearward).
Trim off the excess ends and clean up the thorax area with thread.
Step 7: Dub the Thorax

Create another fine dubbing noodle on the thread and make one or two wraps behind the CDC wing.
Pass the dubbing in front of the wing and create a neat thorax leaving a small gap behind the hook eye.
Step 8: Whip Finish

Whip finish the fly and trim off the thread.
Step 9: Cut the Wing

Separate the CDC fibers from the two microfibbets tails and pull the wing in an upward direction.
With a sharp pair of scissors, come in at an angle about 45 degrees to the shank and cut the wing.
That’s How to Tie an RS2
As you can see, the procedure to tie the RS2 isn’t complicated. I find that the biggest hurdle to overcome is working with such a small hook. As I always say, practice makes perfect, so the more you practice tying these small flies, the better you’ll get.
Please share this tying guide with your fellow anglers and tying friends. Also, leave any comments or suggestions at the bottom of the page. I aim to always improve on these tying guides, so any feedback will be much appreciated.
Until next time.
Amazon and the Amazon logo are trademarks of Amazon.com, Inc, or its affiliates.
As a part of the Amazon Associates Program and other affiliate programs, Into Fly Fishing® may receive a comission if you order products through links on this website.


