As an Amazon Associate I earn from qualifying purchases.
If there’s only one hopper pattern you ever have to learn how to tie, it’s the GFA Hopper. Not only is it a great fish-catching fly, like so many other hopper patterns are, but it’s super fast and simple to tie.
I have made use of this fly from catching large terrestrial sipping brown trout in the high-altitude rivers of Lesotho to smallmouth yellowfish in the remote Richtersveld desert in South Africa. This is my go-to hopper pattern.
As a part of the Amazon Associates Program and other affiliate programs, Into Fly Fishing® may receive a comission if you order products through links on this website.
Quick Look
- Difficulty Level: Medium
- Tying Time: 5 minutes
- Materials: Long/curved shank hook, thread, peacock herl, foam, rubber legs, elk hair, and head cement
- Hook Size: 8 – 14
What Is a GFA Hopper?
The GFA (General Foam Attractor) Hopper was developed by Walter Wiese of Parks Fly Shop in Montana. As far as hopper patterns go, the GFA is incredibly easy to tie and really does the trick.

The GFA Hopper can be tied to imitate a hopper using natural colored foam. It also makes for an excellent cricket pattern when using darker (dark brown and black) foam.
How to Fish a GFA Hopper?
The GFA Hopper is a top-class terrestrial pattern. It can be used on its own as a dry fly or in a dry-dropper rig (also referred to as a hopper-dropper).
As a single dry fly, cast the fly out close to a bank or overgrowing bush. The fly should make an audible “plonk” sound as this will attract inquisitive fish. In a dry dropper rig, a nymph is attached behind the fly. This makes for an excellent river combination
Materials You’ll Need to Tie a GFA Hopper
You will need the following materials to tie a GFA Hopper, so go grab your fly tying kit and get ready.
Hook
A long shank nymph, streamer, or terrestrial hook can be used. Terrestrial hooks are specifically designed for hopper flies and have a slight curve to them.
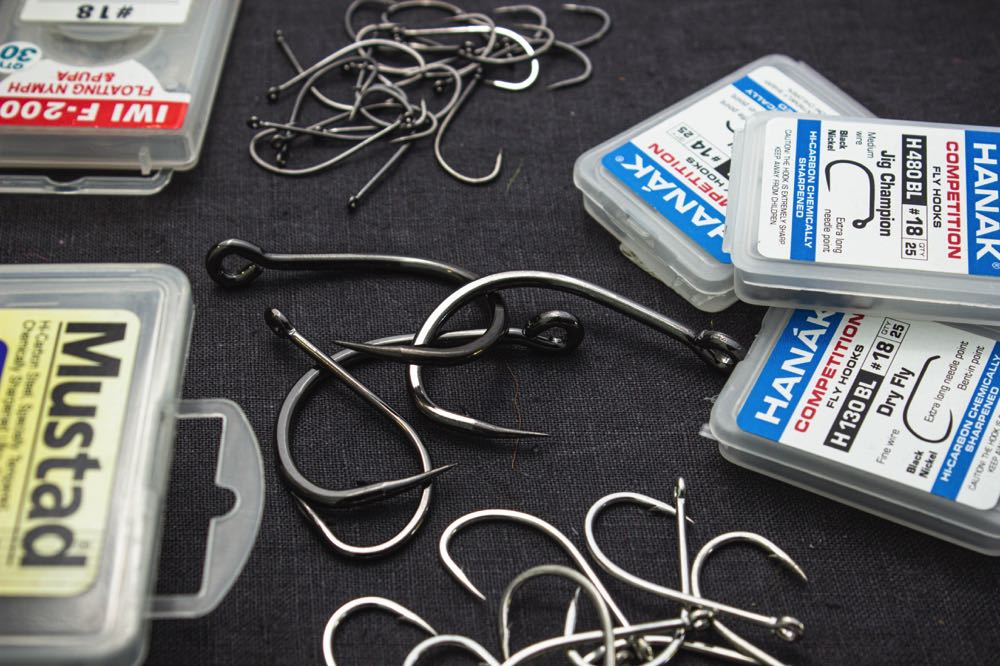
The following hooks work well:
Thread
The chosen thread should not be too thin as this will cut through the foam material. Match the color of the thread to the color of foam you are using.
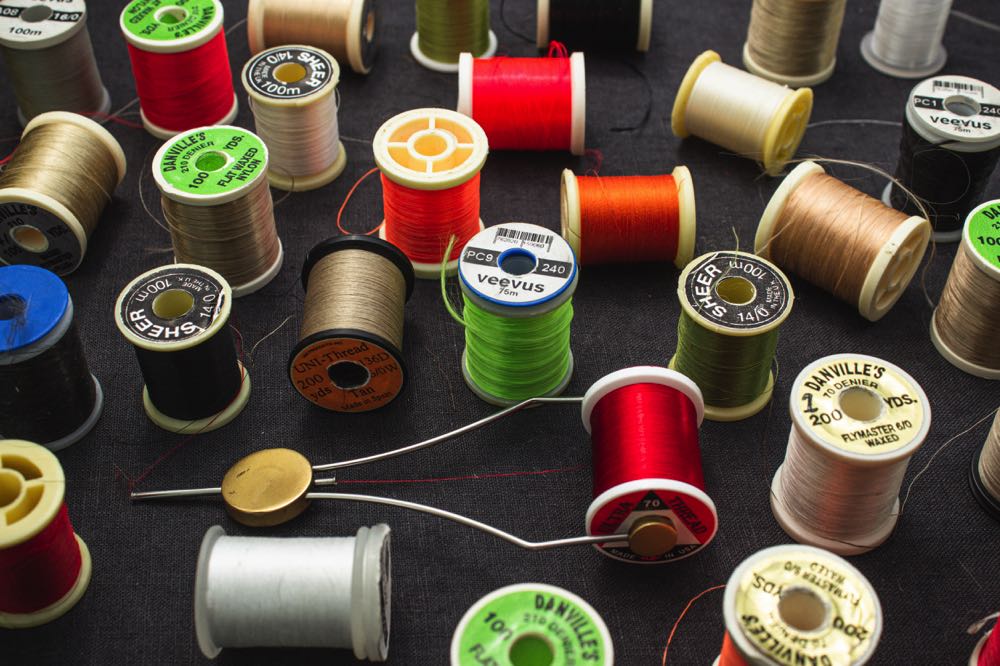
This color will be less visible when you cross over the sections created in the foam.
Recommended 50 Denier 12/0 Thread:
→ Semperfli – Nano Silk 50D 12/0
Under Body
The underbody for the fly is made by wrapping peacock herl around the shank. If you don’t have peacock herl at hand, a bright or flashy chenille can be a good option.
Recommended Peacock Herl:
→ Hareline Strung Peacock Herl
Over Body
The over body is made with 2mm craft foam. You can experiment with the colors. Either match the color of the natural insects (hoppers and crickets) found on your water, or opt for the more extravagant option.
Recommended Foam Sheets:
→ Houseables Crafts Foam Sheets
Wing
The wing is made using either elk or deer hair. I have also used CDC with good effect. You can also incorporate flash fibers in the wing.
Recommended Fly Tying Hair:
→ XFISHMAN Bucktail Hair Assorted
Legs
For the legs, I use round, barred rubber legs. These legs are durable and create excellent movement on the water. If you want to go for a more traditional option, knotted pheasant center tail fibers work well. These can be found in numerous colors.

Recommended Fly Tying Legs:
→ Xfishman Silicon Rubber Legs 12-24 Colors
Sighter
You can add a highly visible sighter to the fly. Colors such as chartreuse, fluorescent orange or pink, and red work well. Materials you can use are:
- Antron yarn
- Poly yarn
- Foam
Recommended Yarn:
→ 8 Colors/Floating Yarn Bundle
Tools Needed to Tie a GFA Hopper
You’ll need the following tools to tie a GFA Hopper:
- Vise (rotary vise helps)
- Bobbin holder
- Whip finishing tool
- Scissors
- Hair stacker
- Bodkin
Watch The Video

Let’s Get Started!
How To Tie a GFA Hopper
Let’s have a look at exactly how to tie the GFA Hopper. The specific materials I am using are listed in the recipe below, but as listed above, there are variations you can use to tie your own GFA Hopper flies.
GFA Hopper Recipe
- Hook: Grip 14582 size 10 – 14
- Thread: Semperfli Nanosilk 50 Denier
- Underbody: Peacock herl
- Over body: 2mm Foam
- Wing: Elk hair
- Legs: Medium round rubber legs
- Sighter: Fluorescent pink Antron yarn
- Super Glue
- Hard as Nails
Step 1: Secure The Hook in The Vise
Place the bend of the hook in the vise. The hook point and barb must be exposed and the hook eye level.
This position will allow you to work without obstruction and prevent the thread from slipping off the hook when whip finishing the fly.

Step 2: Attach The Thread
Place the thread over the hook, leaving a small gap behind the eye of the hook. Once you’ve made a couple of wraps start wrapping the thread backward while maintaining tension on the tag end.
Once the thread is locked in place, cut off the excess.

Step 3: Prepare The Peacock Herl
Remove two or three-strand of peacock herl from the packet (depending on the size of hopper you’re tying).
Cut the tips so that they align.

Step 4: Tie In The Peacock Herl
Tie the aligned tips of peacock herl where you left the thread. Maintain tension on the strands pulling backward.
Then, wrap the thread over the peacock herl backward until you reach the barb of the hook. Wrap the thread forward until you reach the beginning of the thread base.

Step 5: Wrap The Peacock Herl
Wrap the peacock herl forward, with touching turns. Secure it when you reach the position of the thread.
Cut off the excess.

Step 6: Prepare The Foam
Cut a 2-inch length of foam the width of the hook gape and a little bit longer than the total length of the hook.
Cut a smooth taper on the one side. This will form the back of the fly.

Step 7: Tie In The Foam
Place the foam on top of the hook shank. The tapered body should extend just beyond the hook bend.
Tie the foam in at the beginning of the thread base make 3 or 4 securing wraps. There should be a length of foam protruding to the front of the fly.

Step 8: Add Super Glue
Pull the foam up to reveal the underlying peacock herl at the back.
Apply super glue to the top of the peacock herl body.

Step 9: Create The Body Segments
Place the foam on top of the peacock herl body. Make a diagonal jump over the foam with the thread to where you will create the first segment. Once you are in the correct position, make 3 or 4 wraps to secure.
Continue this process until you have created 3 segments for the fly. It’s OK if there’s a slight gap at the end of the peacock herl body. Advance the thread to the first segment of the fly.

Step 10: Cut The Elk Hair
Pull a clump of elk hair forward on the hide. Cut off a piece and remove any loose, short, and fluffy fibers.
You can do this by pinching the bundle with one hand, and with the index finger and thumb of the other hand, gently pull out any rogue fibers from the bundle.

Step 11: Stack The Elk Hair
Place the elk hair fibers into a hair stacking tool, tips first. Give the hair stacker a couple of good taps on a hard surface.
Split the stacking tool and remove the aligned fibers. Before going to the next step, pull out any short hair.

Step 12: Measure The Elk Hair Wing
Place the elk wing on top of the fly body and measure the wing from the first segment to reach the tapered foam body.
The wing will be tied in at the first segment. After you have measured the wing, cut it off slightly longer while keeping in mind the tying in point.

Step 13: Tie In The Elk Hair Wing
Flatten the thread and wrap it around the elk hair, being careful that it doesn’t slip off the cut fibers.
After the first wrap, pull on the thread and make two more securing wraps. If the previous step was done correctly, there will be no excess to cut off.

Step 14: Fold The Foam Over
Put a drop of super glue on the first segment. The drop should be small and just enough to cover the top segment of the fly. If you put too much on by accident, you can remove some with a bodkin.
Fold the forward-facing foam backward and secure in the position where you tied in the wing with three wraps.

Step 15: Tie In The Legs
Cut a long length of rubber legs and fold it in half. Cut the legs at the mid-point. Tie both the rubber leg’s mid-point in on the one side of the fly with two wraps.
Then, pull one of the legs over to the other side of the fly.

Step 16: Tie In The Sighter
Cut a length of bright Antron yarn and tie it in on top of the fly. Once secure, cut to length.
Generally I like to have about an eighth of an inch sighter protruding off of the top of this size of fly.

Step 17: Move The Thread Forward
Move the thread forward in front of the foam head.
This will be just behind the hook eye, where you left that small gap between the thread base and the eye of the hook.

Step 18: Whip Finish The Fly
Whip finish the fly and pull the knot tight. Cut off the thread.
If you don’t know how to do a whip finish, or you need a refresher, check out our guide on how to do a whip finish.

Step 19: Seal The Thread
Place a drop of your preferred head cement or nail varnish on the bottom of the fly where you tied in the most of the material (the thorax) and the head of the fly.
Sealing the thread in this way will help to add a lot of durability and longevity to your fly.

The GFA Hopper

Now You Know
How To Tie a GFA Hopper
I hope that the step by step guide above has shown you how easy it is to tie the GFA Hopper. Now, tie a dozen up and take it to your local trout river. I’m sure that, pretty soon, you’ll have the confidence that I have on the fly.
Please leave any comments or questions at the bottom of the page. We love hearing from you guys.
Until next time.
Like This Article? Pin it!


Amazon and the Amazon logo are trademarks of Amazon.com, Inc, or its affiliates.


