As an Amazon Associate I earn from qualifying purchases.
In this step-by-step tying guide, I’ll teach you how to tie an epic little chironomid pattern: the Chromie.
If you’re regularly fishing lakes and slow-moving water and haven’t fished the Chromie, you need to go sit at your tying desk, grab all the materials listed below, and follow me through this tying guide.
As a part of the Amazon Associates Program and other affiliate programs, Into Fly Fishing® may receive a comission if you order products through links on this website.
Quick Look
- Difficulty level: Easy
- Tying time: 5 minutes
- Materials: Hook, bead, Antron yarn, thread, flash material, copper wire, and Sally Hansen Hard as Nails
- Hook size: 12-16
What is a Chromie?
A Chromie imitates a chironomid nymph getting ready to emerge to the surface. In this phase of the insect’s lifecycle, air bubbles form under its translucent body, giving the fly a silvery look.

This color is the reason why the Chromie is so effective.
Watch The How to Tie a Chromie Video

How To Fish a Chromie?
The Chromie is an excellent lake and stillwater fly. The best way to fish it is with a floating line, long leader, and two flies. The Chromie may be placed as the first or point fly.
Cast the line out to the area where you expect the fish to be. Here’s the most important part: Count how long you allow the flies to sink before you start to retrieve. On the next cast, vary that time so that you either fish deeper or shallower.
Continue to cast and count until you start getting into fish. This counting procedure then gives you a reference to what depth the fish are feeding at, which allows you to repeatedly fish at the optimal depth.
The retrieve itself is very slow. The first retrieve I use when I get to a new stretch of water is a slog figure of eight. What it does is keep you in contact with your flies. Keep a good eye on the end of your fly line.
If you see it dart in any direction, set the hook. Sometimes the stakes are so quick that you won’t feel it.
Materials You’ll Need To Tie a Chromie
You’ll need the following materials to tie a Chromie:

Hook
Traditionally, a Chromie is tied on a straight shank hook. This, however, doesn’t mean you can’t tie them on a good scud hook. So, any sharp and robust hook with a medium to thick wire will work perfectly.
The size of the hook will be determined by the size of the midge or chironomid prevalent in the water you’re fishing. Suitable sizes of Chromies to carry in your lake box range from 12 to 16.
Some of my favorite hooks for Chromies include:
Bead
There are various bead options you can use on a Chromie. The most popular are made from brass and tungsten. I mostly make use of tungsten beads as the high relative density of the material allows the fly to sink quickly to the correct depth.
The color of the bead may be varied too. Tungsten beads come in a wide range of colors these days, making it possible to tie accurate imitations or suggestive patterns for a reaction take. Some of the best colors for Chromies include:
- Black
- White
- Silver
- Gold
- Fluorescent orange
- Metallic red
Thread
Any flat thread between 140 and 70 Denier will suffice, but I recommend a thread that has a lovely sheen to it. For this reason, I love using UTC Ultra Thread on all my buzzers, including the Chromie.
The thread forms the base for both the abdomen and thorax of the fly, where the latter is usually a complementary color.
Synthetic Yarn/Fibers
This material is used to imitate the white gills of the insect, and in the end, only a small piece is used. Any white or translucent material may be used, but some of my favorite options are:
- White Antron yarn
- White Steve Farrar fiber
- Sculpting fiber
Flash
The flash is used as ribbing over the thread body. Take note of the thickness of the flash fiber you’re planning on using. You need to create between six and eight segments over the abdomen, so a fiber that’s too thick will prevent you from doing this.
Although silver is probably the most popular flash color, you can go to town here.
Ribbing
Apart from the flash, the Chromie also has a secondary ribbing material. Any ribbing wire will work, where the diameter should suit the size of the fly. We’re not tying a Brassie here, so the wire should be thin and purely complementary.
Varnish
Very much like a standard Buzzer pattern, a Chromie’s body is sealed with a clear varnish. I prefer using Sally Hansen Hard as Nails.
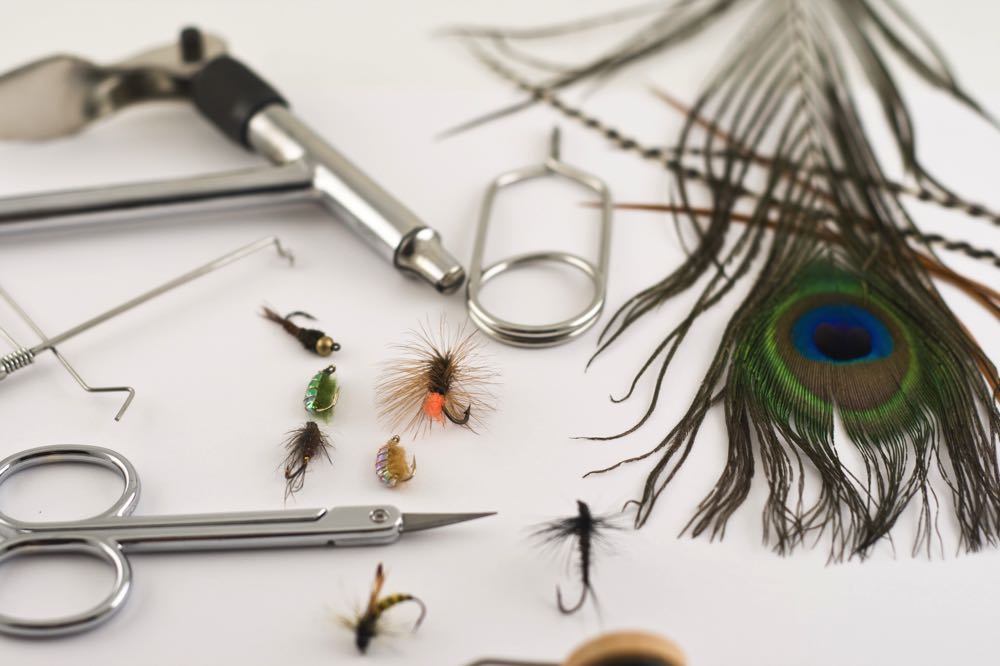
Tools Needed To Tie a Chromie
You’ll need the following tools to tie a Chromie:
- Vise
- Bobbin holder (having two helps a ton as you’ll be using two threads)
- Whip finishing tool
- Scissors
- Bodkin
- Sally Hansen Hard as Nails
Step-by-Step Guide To Tie a Chromie
Let’s go through the step-by-step procedure to tie a Chromie.
Chromie Recipe
The specific materials I use are:
- Hook: Mouche 8423 size 14
- Bead: 2.5mm countersunk tungsten bead in chartreuse color
- Gills: White Antron yarn
- Thread: Grip 6/0 standard thread in light olive
- First ribbing: Silver flashabou
- Second ribbing: Semperfli 0.1mm brown wire
- Thorax: Danville’s 6/0 Flymaster burnt orange
Step 1: Slide the Bead on the Hook
 Slide the small side of the countersunk bead over the hook point and allow it to sit against the hook eye.
Step 2: Secure the Hook in the Vise
 Place the bend of the hook between the jaws of your vise and secure it in place. What you’re looking for is a level shank.
Also, ensure that the hook is secured correctly in the vise so that it doesn’t come loose while you’re tying.
Step 3: Secure the Olive Thread in Front of the Bead
 Slide the bead all the way to the back of the hook. Hold the end of the tying thread in your non-tying hand and place the thread over the hook about 1/5 of the hook shank length behind the eye.
Wrap the thread forward, with touching turns, five or six times. Then, back the thread over itself five times to lock it in place.
Then, cut off the excess.
Step 4: Lay a Thread Foundation
 Lay a thread foundation forward until you reach the eye.
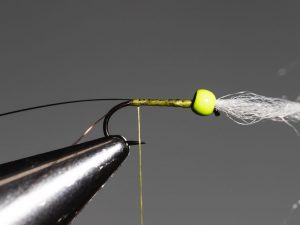
Step 5: Tie in the Gills
 Cut off an inch of Antron yarn and tie it in on top of the hook with a pinch wrap. Make one or two more securing wraps.
Pull the forward-facing part of the Antron back and pass the thread between the material and the hook eye. Form a neat head for the fly.
Step 6: Whip Finish
 Whip finish the fly with your finishing tool and cut off the thread.
Step 7: Cut Off the Rear Facing Material
 Cut off the rear-facing piece of Antron yarn at the tying-in point.
Step 8: Push the Bead Forward
 Push the bead forward over the material you’ve just tied in until it sits against the hook eye.
Step 9: Secure the Thread
 Secure the olive thread behind the bead in the same way you did in Step 3 above.
Step 10: Lay a Thread Foundation
 Lay a thread foundation from the front of the hook shank with touching wraps. Remember to open the thread every now and then to make sure it lies flat.
The flat thread creates a smooth taper and body. Stop the thread base where the hook bend starts, then run it forward again to behind the bead.
Step 11: Tie in the Ribbing
 Place a piece of ribbing wire on the side of the shank and secure it with thread behind the bead.
Run the thread back, securing the wire to the bend of the hook. Run the thread forward again to the same point where you tied in the ribbing.
Step 12: Tie in the Silver Flash
 Tie in the silver flash behind the bead and secure it all the way back again, to where the thread base stops.
Step 13: Create the Body
 Open the thread by spinning the bobbin holder anti-clockwise. Now, form a neatly tapered abdomen with touching wraps. Stop just behind the bead.
Step 14: Whip Finish
 Whip finish the olive thread and cut it off.
Step 15: Secure the Orange Thread
 Secure the orange thread behind the bead in the same way you did the two previous times.
Step 16: Wrap the Silver Flash
 Wrap the silver flash in the same direction as your thread and so doing, creating between 5-7 segments. Secure with thread behind the bead and trim off the excess flash.
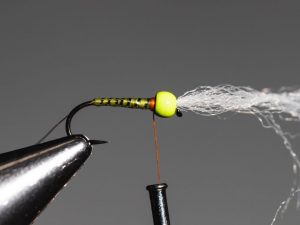
Step 17: Wrap the Ribbing
 Wrap the ribbing wire once again in the same direction as both the thread and flash material.
Secure just behind the bead and trim off the excess.
Step 18: Whip Finish the Thread
 Create a neatly tapered thorax with the orange thread and whip finish the fly. Trim of the thread.
Step 19: Trim the Gills
 Pull the forward-facing Antron yard over back over the bead and trim the same length as the bead.
Step 20: Apply Varnish
 Apply a thin coat of Sally Hansen Hard as Nails over the entire body and thorax. Be careful not to overdo it, but rather add another layer later if needed.
That’s How To Tie a Chromie
Now, if you’re a lake fly angler and looking for a fly that will catch you a heck-load of trout, the Chromie is it. I suggest carrying many of these flies in your box, in various colors, sizes, and weights.
I hope that you found this tying guide helpful and that it inspires you to tie and fish your own flies. If you have any questions or suggestions, please drop them at the bottom of the page. I’ll do my best to get back to you as soon as possible.
Until next time.
Amazon and the Amazon logo are trademarks of Amazon.com, Inc, or its affiliates.


