As an Amazon Associate I earn from qualifying purchases.
Every modern, self-respecting fly box needs a Parachute Adams collection, and this post is going to teach you how to tie a Parachute Adams in just a few minutes.
Although it might be considered a hard fly to tie (especially considered to easier flies like the Wooly Bugger) stick with me and you’ll whip them out pretty soon.
The original Adams was developed by Leonard Halladay in 1922. Since then it has gone through many material changes. But in essence, the fly is still tied and fished in the same way. Although the original is an effective pattern, it has some room for improvement.

On very small sizes, the cock hackle would sometimes push the fly away from the fish’s mouth during the take. It also obstructs the hook point somewhat. The original also includes two grizzly hackle tip wings that serve little purpose and are a hassle to tie in for beginners.
The Parachute Adams on the other hand solves these issues and delivers a fly that has an incredible surface footprint that trout love. It also incorporates synthetic material that holds floatant well, resulting in a very buoyant fly.
Watch the How To Tie A Parachute Adams Video

Quick Look
- Difficulty Level: Moderate
- Tying Time: 10 – 15 minutes
- Materials: Dry fly hook, fine flat thread, Coq de Leon feather, fine dry fly dubbing, Antron or polypropylene yarn, cock hackle
- Hook Size: 12 – 20
What is a Parachute Adams?
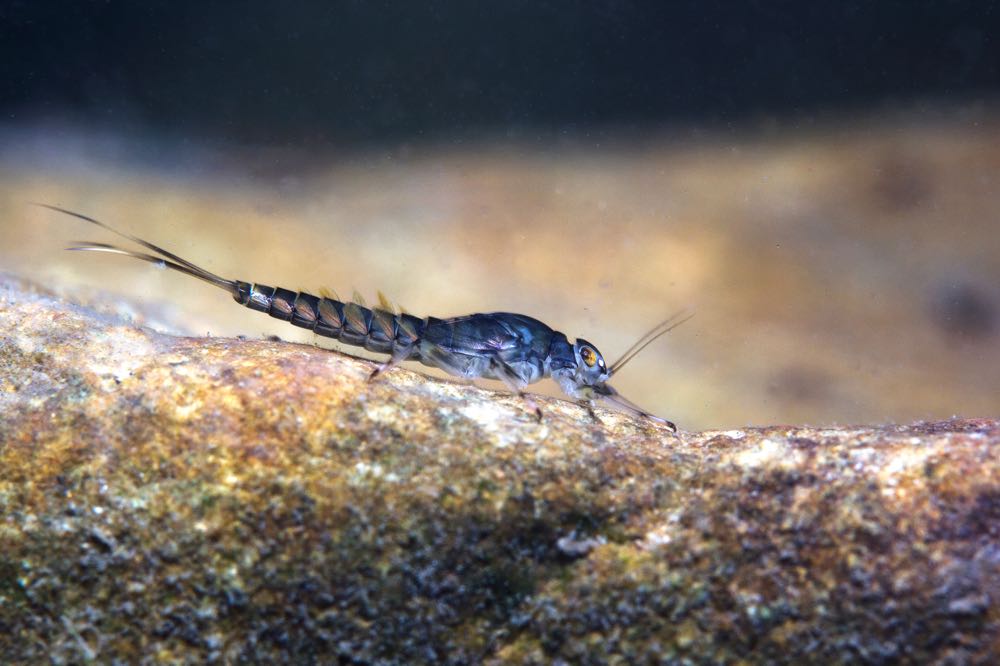
A Parachute Adams is a mayfly larva imitation derived from the original Adams dry fly. Depending on the mayfly you would want to imitate, it can be tied in various colors and sizes.
By incorporating a parachute hackle, the fly creates a large and attractive footprint, while maintaining hook point access. It also ensures that the fly sits lower and more effectively in the surface film.
The post of the fly itself can act as a sighter in low light conditions. I regularly tie the post in bright colors, such as fluorescent pink. This helps me see the fly when it’s getting dark or when fishing shadowy overhangs.
Materials You’ll Need to Tie a Parachute Adams
To start tying a Parachute Adams, the following materials will be needed. I would like to iterate that this is not set in stone. You are welcome, and I would encourage you, to experiment.
Hook
Any dry fly hook in size 12 – 20 will work. I prefer using a barbless wide-gape dry fly hook. But the choice is yours.

Recommended Fly Tying Hooks:
→ XFISHMAN Assorted Fly Tying Hooks #10-16
Thread
Any fine waxed thread will work. I recommend a thread that can lie completely flat as this will prevent an overly bulky fly. Match the thread color to the color of the intended fly.
If you can only choose one color thread to buy, choose white. You can always color the thread with a permanent marker while building the head.
Recommended Fly Tying Thread:
→ Danville’s Flymaster Plus 140 Denier Thread
Tail
There are various materials that you can make use of. The most popular include cock hackle, Coq de Leon, and microfibbets (similar to paintbrush fibers). Whatever material you use, ensure that the material is very fine and stiff.
Recommended Coq de Leon Feathers:
→ Whiting Farms Coq De Leon Hen Soft Hackle with Chickabou
Body and thorax
On large variants (12 – 14), I make use of Hareline Superfine Dry Fly Dubbing. There are many similar dubbings on the market. On small flies (16 – 20), I use stripped peacock quills. It creates a lightweight narrow profiled body that resembles that of a small mayfly.

Recommended Dubbing Material:
→ Hareline Ice Dub – Dispenser W/ 12 Popular Colors
Ribbing
On larger flies, you can add very fine wire to create a segmented dubbing body. I prefer not using any ribbing on my dry flies.
Recommended Ribbing Wire:
→ Phecda 10pcs Assorted Colors 0.3MM Copper Wire
Post
To construct the post, make use of Antron or Poly Yarn. Some tiers make use of micro-foam cylinders as well. The post has three main purposes:
- Firstly, it creates a structure where you can wrap the hackle around.
- Secondly, it is used to absorb and carry floatant.
- Thirdly, the post can be used as a sighter to spot the fly. This comes in very handy in low light conditions, as you can make use of highly visible colors. As the post almost always points upward, it does not have any effect on the fish’s point of view.
Recommended Yarn:
→ 8 Colors/Floating Yarn Bundle
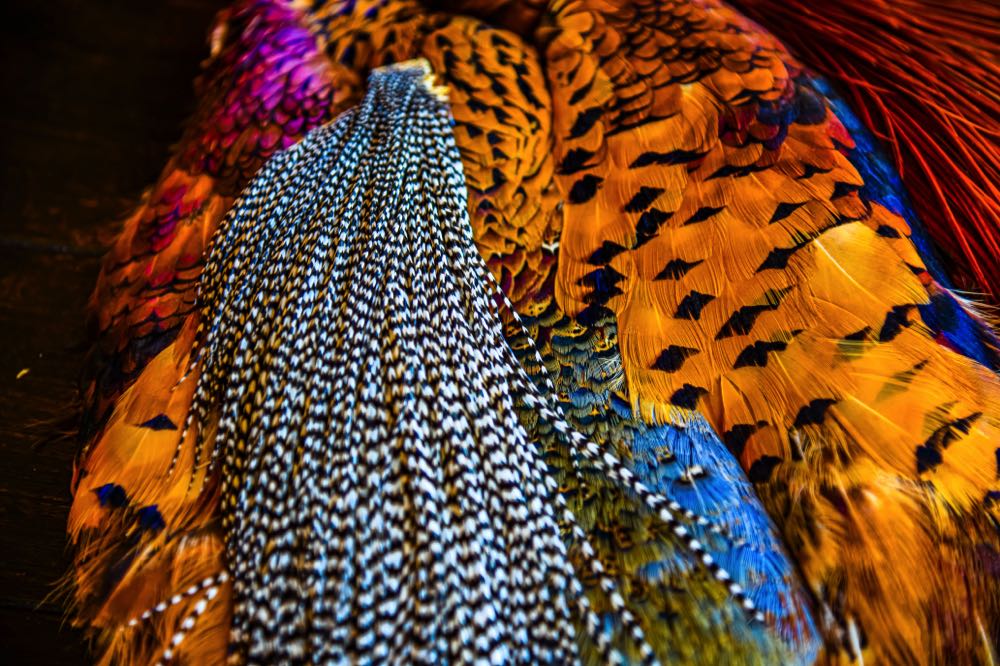
Hackle
On large flies, make use of any grade of cock saddle or neck hackle. Most of the “weight” is carried by the larger post. On small flies however the post is much smaller. Therefore, it’s important to make use of a high-quality saddle or neck hackle.
Brands to look out for include Whiting and Metz. Sideling Hackle is also a small breeder with some interesting hackle at good prices.
Recommended Hackle:
→ Introductory Hackle Pack – 4 Assorted
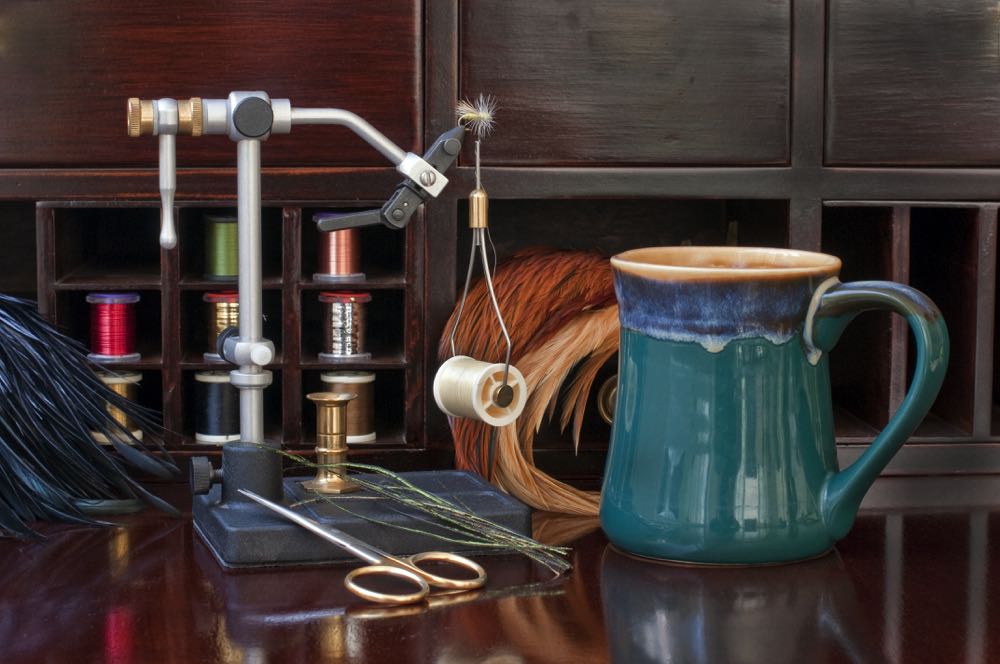
Tools Needed
You don’t really need many tools for this particular fly, but these are the absolute basics that will make learning how to tie a Parachute Adams a lot easier.
Let’s Get Started!
How To Tie a Parachute Adams
For the step-by-step guide, I have selected one of my favorite color combinations. You are more than welcome to follow along with other materials, as the basic principle and structure remain the same.
Amber Parachute Adams Recipe
- Hook: Hanak H 120 BL, Size 12 – 20
- Thread: Griffiths Sheer 14/0 White
- Tail: Coq de Leon
- Body: Amber Hareline superfine dry fly dubbing
- Thorax: Brown Poly Yarn mixed with seals fur
- Post: Fluorescent pink Antron yarn
- Hackle: Appropriately sized ginger grizzly saddle hackle
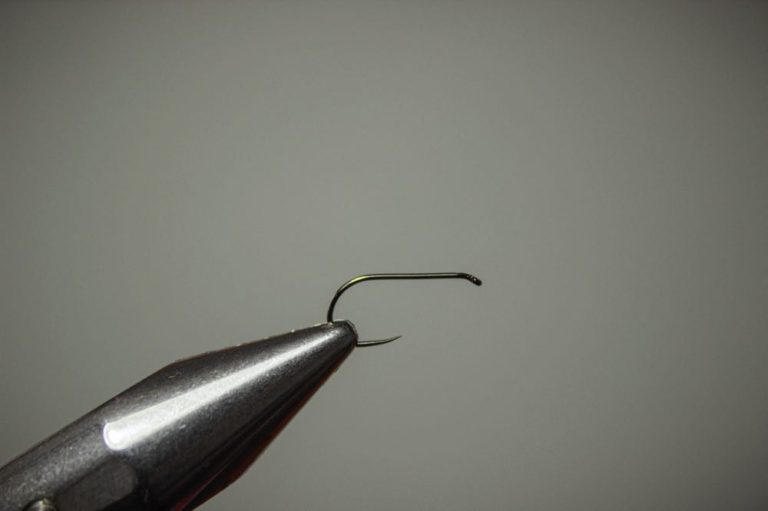
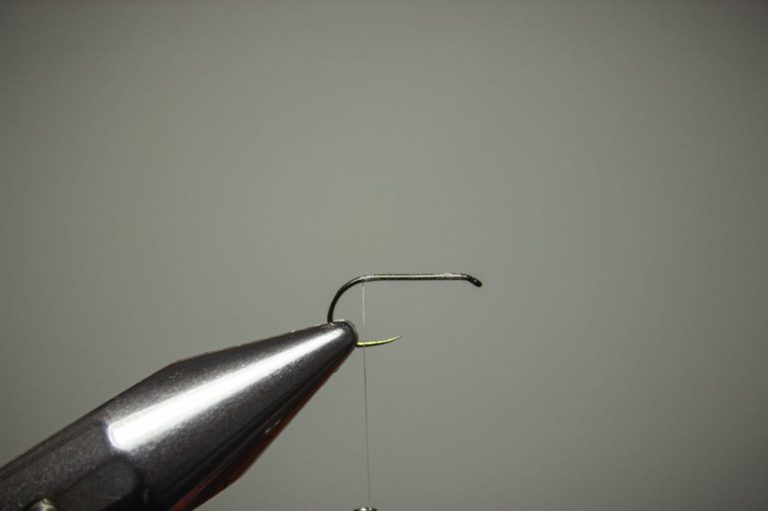
Step 1: Place The Hook in The Vise
Remove a hook from the packet or box and, with your thumb and forefinger, place it between the jaws of the vice. While holding it in place, lightly close the jaws with your other hand.
Let go of the hook, and after making sure that the shank is level and the hook is seated correctly in the jaws, lock the cam of the vice.
Step 2: Tie On & Lock The Thread
Wrap the thread around the shank a couple of times and lock it in by running the thread over itself. Break or cut off the excess tag end.
Before laying the thread foundation, twist the bobbin holder in an anti-clockwise direction to flatten the thread. You can see if it’s flattened by running a bodkin against the thread. The flattened thread will reduce bulk on the fly.

Step 3: Lay a Thread Foundation
With the flattened thread, run the thread to the hook’s eye, and with touching turns wrap down the shank. Remember to flatten the thread every now and then while wrapping. Stop the thread at the point where the bend of the hook starts.
Once you have a solid thread foundation, with each turn toughing the previous wrap of thread, you can continue to the next step.
Step 4: Measure The Coq de Leon Tail
Cut 6-8 fibers off the Coq de Leon feather, ensuring that their tips align. While pinching the fibers between your thumb and forefinger, measure the length of the tail against the hook shank. The tail must be as long as the hook’s shank. Once you are happy with the length, transfer the fibers to the back of the hook where you left the thread.

Step 5: Tie On Coq de Leon Tail
Now that the Coq de Leon tail is measured and you have it laid against the hook shank, tie it in by making use of pinch wraps. Make one thread wrap behind and under the tail fibers as well, this will make them stand up slightly.
Cut off the excess tail fibers and run flattened thread forward, covering all lose material.

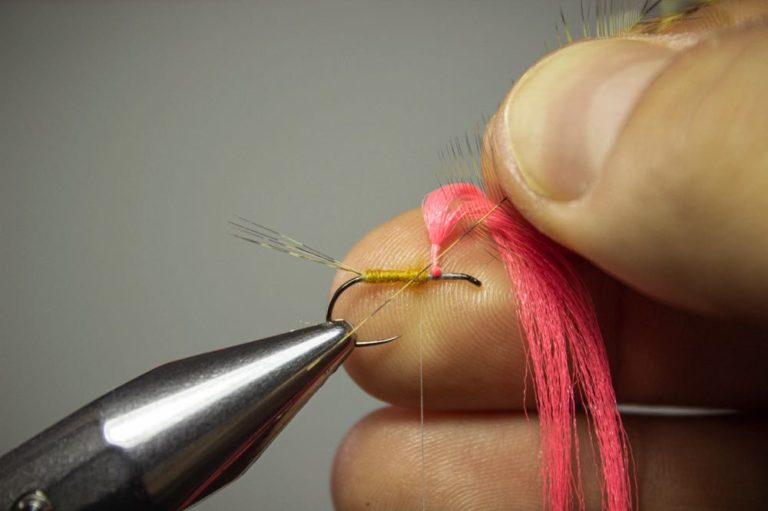
Step 6: Tie in The Antron Yarn
Advance the thread ¼ of the hook shank length behind the eye. Cut a 4inch section of the Antron yarn. Run the mid-point of the Antron behind the hook and under the thread.
Make 3 – 4 wraps over the material to secure it firmly into place. While pulling the ends of the Antron in opposite directions, turn the material to 90-degrees to the hook shank. Then, by making use of figure-of-eight wraps, secure it in place.

Step 7: Build The Post
Now, pull both ends of the Antron yarn upward. While holding it in place, and under tension, start wrapping the thread clockwise around the Antron post.
Continue wrapping upwards, with touching turns, for about 1/10 of an inch. Remember to keep tension on the post with your opposite hand, this will make it much easier.

Step 8: Dub The Body
Take a small amount of dubbing and create a fine, long dubbing noodle. Now start wrapping your thread around the body. After each wrap turn and pull on the dubbing to ensure that it forms a neat body. If you have to add more dubbing somewhere along the line, that’s fine. Just make sure you keep turning on the dubbing noodle to make sure that the body forms neatly. Stop the body while leaving a space behind where you tied the post in

Step 9: Select The Right Portion of Hackle
Selecting the correct size hackle can be quite difficult for a beginner. Select the hackle too long and fly will lose its finesse. Or select it too short, and the hackle might lack the desired footprint and buoyancy.
A handy tool is a hackle gauge. It will make sure you acquire consistent results.

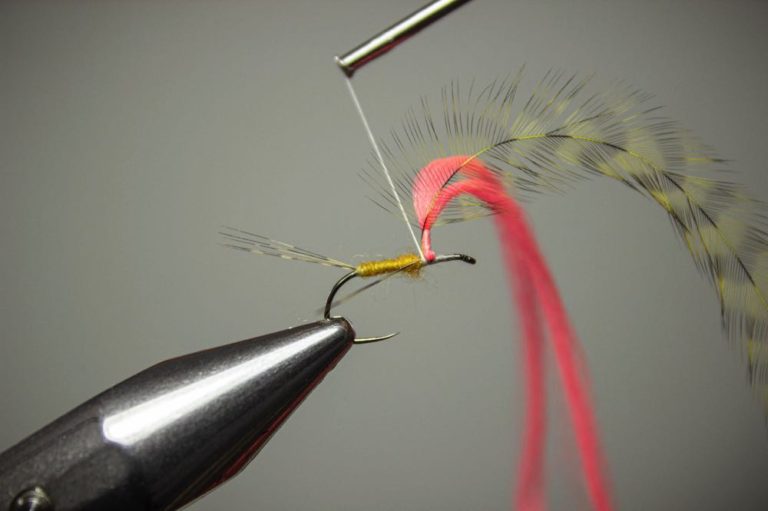
Step 10: Prepare The Hackle
After selecting a suitable hackle, hold the feather by its tip with your left thumb and forefinger. With your right thumb and forefinger, pull back the fibers so that they are 90-degrees to the stem.
Remove some of the fibers that are closest to the tip to expose the bare stem. This is where you’ll tie the hackle onto the hook shank.
Step 11: Tie in The Hackle
While holding the exposed stem of the hackle against the post, tie the hackle in with the feather pointing upwards. Ensure that the brightly colored side of the feather is facing the post.
Run the thread up the post, around the feather, up to the point where you stopped the previous time.
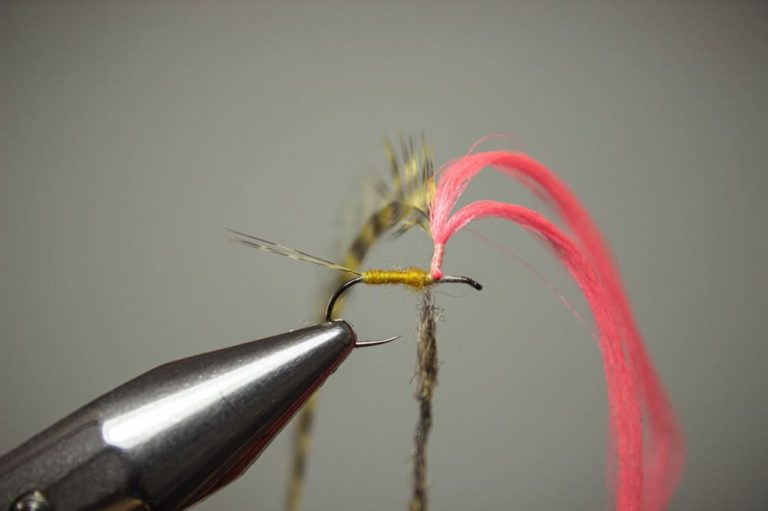
Step 12: Dub The Thorax
The thorax that I’m using is a 50/50 mixture between brown Poly dubbing and seals fur. The synthetic Poly dubbing holds the floatant while the seal’s fur creates a lifelike thorax.
Move the flattened thread back to where you ended the amber body. With the same technique, dub in the thorax forward ending just behind the eye of the hook.
Step 13: Complete The First Whip Finish
Pull back any forward-facing material and fibers while creating a small and neat head for the fly. Whip finish and apply head varnish if you wish to. Cut off the thread.
This fly requires two whip finishes as you will see later on in this tutorial.

Step 14: Turn The Fly
While holding the fly, release the cam of the vice jaws. Turn the fly 90-degrees forward so that the post is now in the plane where your hook shank was. Place the hook in the vise’s jaws, apply the cam.
The fly should now point downward with the post and hackle hanging lose.

Step 15: Reattach The Thread
Take the thread behind the hackle and lock it in at the base of the post with a couple of wraps. Cut off the excess tag end and do a couple more thread wraps.
The thread should now be securely locked into place.

Step 16: Wrap The Hackle
Apply a hackle plier to the hackle’s tip. While pulling the end of the Antron post tight, wrap the hackle in a clockwise direction down toward the base of the post. When you reach the bottom, secure the hackle with three thread wraps.
Make sure that you don’t trap any hackle fibers while locking it in place with the thread. Depending on the tidiness of the hackle, you can move the thread around the hackle fibers.

Step 17: Cut Off The Excess Hackle
Once you are sure that the hackle is secured, cut off the excess very carefully. Things to look out for here are accidentally cutting off the thread or removing hackle fibers.
Get nice and close to the hackle as you’re cutting it to make sure your scissors are in the right location.

Step 18: Shorten The Post
While pulling on the Antron post, place your scissors approximately 1/10 inch above the point where the hackle starts.
Being careful to not accidentally cut off any hackle fibers, make one clean cut to shorten the post so that it protrudes from the hook shank about one-tenth of an inch.

Step 19: Finish The Fly
Whip finish the fly once again being careful of trapping any hackle fibers. Before pulling the knot tight, turn the rotary vice around to inspect. If you see any trapped fibers, remove them with a bodkin. Tighten the knot.
Once you’re satisfied with the finish, you can cut off the tying thread and tidy it up.

The Parachute Adams
Now You Know How to Tie a Parachute Adams
I know it’s not the easiest fly to tie, but I would like to encourage you to keep trying. There are so many important techniques and learnings you gain with this fly. If you know how to tie a Parachute Adams, you’ll be able to tie almost any dry fly.
It teaches you to plan your fly and keep proportions in mind. You will also learn to work with delicate materials, such as Coq de Leon. The parachute itself is also used in other modern dry flies, so conquering it will open many other doors.
Amazon and the Amazon logo are trademarks of Amazon.com, Inc, or its affiliates.
As a part of the Amazon Associates Program and other affiliate programs, Into Fly Fishing® may receive a comission if you order products through links on this website.


