As an Amazon Associate I earn from qualifying purchases.
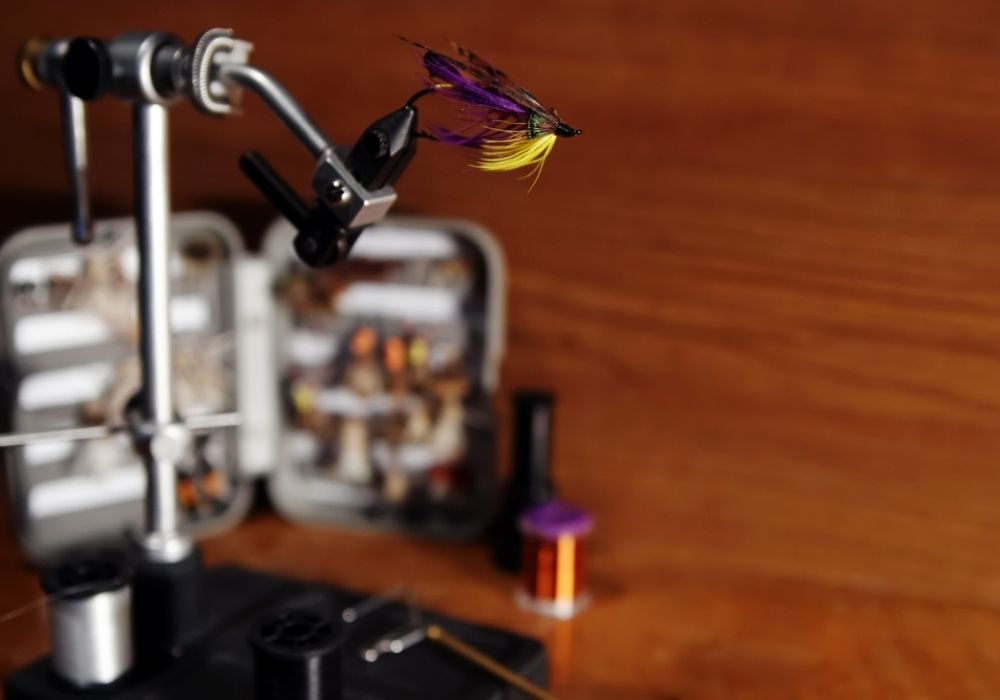
In this tying tutorial, I’ll teach you how to tie one of my new favorite dry flies, the Ultimate Parachute Adams.
If you read my previous post on the standard Parachute Adams, you know that I use it every time I fish for river trout. Now, this improved version is my go-to dry fly for difficult trout.
As a part of the Amazon Associates Program and other affiliate programs, Into Fly Fishing® may receive a comission if you order products through links on this website.
Quick Look
- Difficulty level: Hard
- Tying time: 3-5 minutes
- Materials: Hook, thread, micro fibbets, turkey biot, poly yarn, dry fly dubbing, dry fly hackle, and CDC
- Hook size: 12-18
What Is the Ultimate Parachute Adams?
The legendary Adams dry fly has been around for decades and used to feature a standard dry fly hackle with two wings made from a grizzly hackle’s tips. After the invention of the parachute-styled hackle, the Adams was adapted and, in my opinion, improved by incorporating this technique.

Parachute hackle gives the fly a pronounced footprint and provides ample buoyancy, along with a significant improvement in hook gape access. The stiff hackle on the standard Adams sometimes pushes the fly as a fish takes it, especially on slow rises.
The Ultimate Parachute Adams was introduced to me a year ago by fellow South African fly tier Gordon van der Spuy. Gordon calls it the “Best of Both” fly. In addition to the parachute-styled hackle, the fly is improved even further by adding a sparse CDC hackle.
Watch the How to Tie the Ultimate Parachute Adams Video

How to Fish the Ultimate Parachute Adams?
I fish this Adams variation like any other dry fly, either on its own or in a dry-dropper combination.
If you use the fly in a dry-dropper combination, make sure to proof the post and hackle well before use. Also, limit the weight of the suspended fly you attach behind the Adams, as it drowns reasonably easily.
Materials You’ll Need to Tie the Ultimate Parachute Adams
You’ll need the following materials to tie the Ultimate Parachute Adams:
Hook
A light wire dry fly hook is essential for the fly to float well. I prefer using barbless hooks as they’re easy on a fish’s mouth and penetrate fast and deep. We’re not fishing with bait, so no barb is required – just make sure you maintain tension while fighting the fish.
Thread
A thin flat-lying thread is used to prevent an unnecessary buildup of bulk. It should also be possible to split the thread to create the CDC hackle around the post.
Some of my favorite threads for this fly are:
- Griffith’s Sheer 14/0 (my number one choice)
- UTC Ultra Thread 70 Denier for larger versions
- Semperfli Nano Silk 50D or smaller
Micro Fibbets
I’ve started using micro fibbets for the tail on my Parachute Adams. You’re more than welcome to use Coq de Leon; it works and looks exceptionally well. I use micro fibbets because they’re durable and very stiff. It’s also possible to use only two fibers if you want to tie sparse, realistic-looking tails.
Turkey Biot
To be honest, the fly’s abdomen can be tied using a range of materials like dubbing and stripped peacock quill. I like using a single turkey biot as it’s quite strong, creates a nice segmented look, and leaves the body slender.
Poly Yarn
The post of the Ultimate Parachute Adams is made from polypropylene yarn. This material is known to absorb whatever you put it into. So, for instance, if you don’t proof the fly well, the post absorbs water.
However, if you proof the post, the poly yarn absorbs the proofing liquid or gel, which means it will float for days.
Hackle
Many flies out there may be tied using cheap alternatives for the materials. The hackle on any parachute-styled fly must be tied using the best quality feathers. This is the one area where you cannot afford to skimp. Buy the best you can.

The hackle fibers on these small parachute flies help carry the weight. Good feathers look great and, more importantly, fish better.
Dubbing
The thorax may be created, once again, by using various materials. A good option is peacock herl. On the flies that I tie, I use a fine waterproof poly dubbing. The color may be varied to match the exact mayfly you’re trying to imitate.
CDC
A little CDC goes a long way on the Ultimate Parachute Adams. I use a large Marc Petitjean and tie up to four flies on a single feather. The same principle as the hackle applies here – buy the best you can afford.
Varnish
Although not 100% necessary, many anglers like to add a drop of varnish to the finished fly. I don’t do this to my own flies that I know I’ll fish within a week or two, because the fish will destroy them before anything else.
However, when I tie flies for clients, I like to add a drop of Sally Hansen Hard as Nails on the whip finish for that peace of mind. The last thing you want is a client returning from a fishing trip and saying your flies all unraveled.
Tools Needed to Tie the Ultimate Parachute Adams
You need the following tools to tie the Ultimate Parachute Adams:

- Vise (rotary vise helps)
- Bobbin holder
- Pair of sharp scissors
- Bodkin
- Hackle plier
- Whip finishing tool
- Paper clamp
Step-by-Step Guide to Tie the Ultimate Parachute Adams
So now that you have all the materials and tools ready to tie the fly, let’s get cracking. Below is a list of the exact materials I use on the tie and after that is the step-by-step procedure.
The Ultimate Parachute Adams Recipe
The specific materials I use are:
- Hook: Mouche 8426 size 16
- Thread: Griffith’s Sheer 14/0 cinnamon
- Tail: Hends micro fibbet
- Abdomen: Turkey biot grey
- Post: Poly yarn white
- Hackle: Whiting grade bronze grizzly neck hackle
- Thorax: FlyRite poly dubbing black
- CDC: March Petitjean CDC color bistre
Step 1: Secure the Hook in the Vise
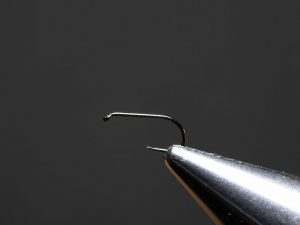 Place the bend of the hook between the jaws of the vise and lock it in place. What you’re looking for is a level shank and the hook barb and point exposed.
Test to ensure the hook is adequately secured.
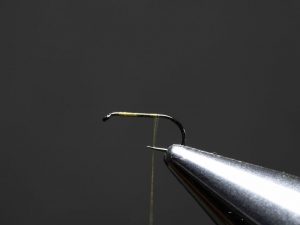
Step 2: Attach the Thread
 Place the thread over the hook, about a quarter hook shank length behind the eye. Wrap the thread forward five times and then back over itself five times.
Trim off the excess thread but don’t discard it yet – set it aside for later.
Step 3: Lay a Thread Foundation
 Open the thread by spinning the bobbin counter-clockwise and make neat touching wraps rearward until you reach a point close to the bend of the hook.
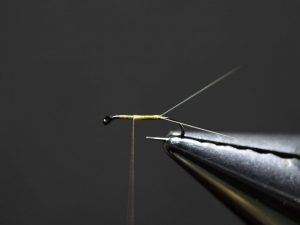
Step 4: Tie In the Tail
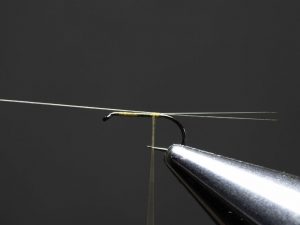 Cut off two micro fibbets and align their tips. Measure the tail to be between one and a half and twice the hook shank length.
Tie in the tail with a pinch wrap where you left the thread. Secure with a couple more wraps.
Step 5: Split the Tail
 Take that piece of thread you cut off when you attached the thread and fold it around the hook bend, under the tail.
Take both ends in your non-tying hand while you split the two fibbet fibers with a bodkin.
Now pass the folded thread between the fibers and secure it with thread in front of the tail.
Trim off the excess thread pieces and fibbet material.
Step 6: Tie In the Turkey Biot
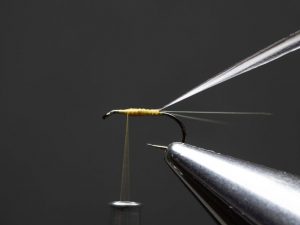 Place a single turkey biot against the hook shank so that the side with the dark marking faces to the back of the fly.
Tie in the biot at the tip and advance the thread forward, building a nice taper as you go.
Stop the thread about a third of the shank length behind the eye.
Step 7: Wrap the Turkey Biot
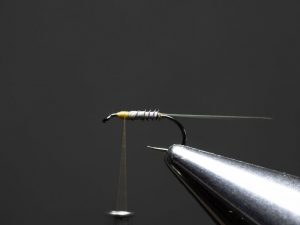 Wrap the biot around the abdomen in the same direction as the thread.
You’ll notice that the dark edge of the biot creates a lovely ribbing effect. Wrap forward until you reach the thread.
Tie off and discard the excess.
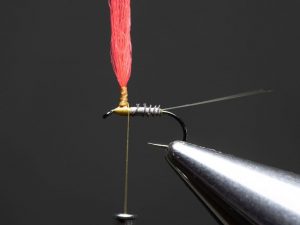
Step 8: Tie In the Poly Yarn
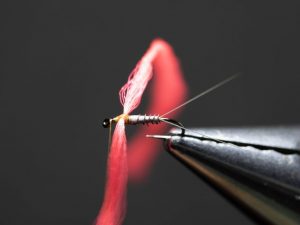 Move the thread halfway up the remaining section of the shank (which will become the thorax).
Place a two-to-three-inch section of poly yarn on top of the hook shank and secure with thread.
Pull the poly yarn to the sides of the hook and secure it with a couple of figure-eight wraps.
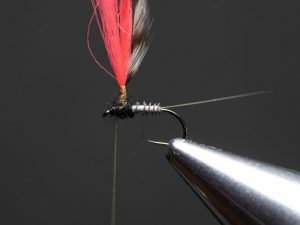
Step 9: Create the Post
 Pull the poly yarn upwards and wrap it around its base in a clockwise direction.
Keep going upward until you reach a height of about half the width of the hook gape.
To learn the correct technique, please watch the video about the procedure.
Step 10: Prepare the Hackle
 The hackle must be of suitable size. You can either use a hackle gauge or see what looks right for you – don’t go too small, though.
Pluck a suitable feather from the skin and pull off any fluffy fibers from the base. Pull all fibers, so they’re perpendicular to the stem.
If the feather’s shiny side faces you and the base is pointing upwards, remove all the fibers on the right-hand side of the feather. Leave a section of stem exposed about a hook shank in length to tie in the feather.
Step 11: Tie In the Hackle
 Place the feather against the post in an upright position, with the tip pointing upwards.
The first fibers of the hackle must start where the post’s thread wraps end. Secure with a couple of wraps around the hook shank, then transfer the thread to the post.
Now secure the hackle up the post to where the thread wraps end.
Step 12: Dub the Thorax
 Transfer the thread back to the thorax area and form a neat slender dubbing noodle on the thread.
Dub the thorax both in front and behind the post – but don’t overdo it.
Transfer the thread back to the base of the post
Step 13: Wrap the Hackle
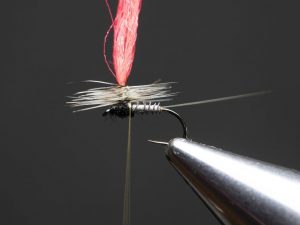 Wrap the hackle in a clockwise direction while pulling the post upward to maintain tension.
Wrap downward with touching turns, leaving a small gap at the base of the post for the CDC hackle.
Secure the hackle with two thread wraps and trim off the excess.
Step 14: Clamp the CDC Fibers
 Depending on how buggy you want the fly to be, clamp the required amount of CDC fibers while they’re on the stem.
Trim them off the stem.
Step 15: Split the Thread
 Open the thread again by spinning the bobbin counterclockwise.
When you see the thread is lying flat, split it right in the middle with a pair of scissors or a sharp bodkin.
Step 16: Create the CDC Brush
 Place the base of the CDC fibers between the thread, pull on the bodkin to clap them, and open the paper clamp to release the fibers.
Place the thread behind the CDC fibers over your finger, creating a 90-degree angle between the brush and the bobbin.
Spin the bobbin until you have a very buggy-looking CDC brush.
Step 17: Hackle the CDC
 Wrap the CDC hackle around the base of the post while stroking the fibers upward after each turn.
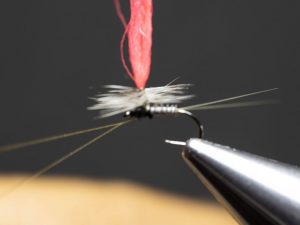
Step 18: Finish the Fly
 Transfer the hackle from the post to behind the hook eye and create a small, neat head.
Do a three or four-turn whip finish and trim off the excess.
Step 19: Trim the Post
 Trim the post at a 45-degree angle leaving a small amount protruding above the hackle.
That’s How to Tie the Ultimate Parachute Adams
I hope that you found this article helpful. I know the techniques might be slightly hard, but I can promise you that if you take the time to learn them and master this fly, you’ll catch fish like nobody’s business.
Please share this tying guide with your fellow anglers and friends. Also, leave any comments, questions, or suggestions at the bottom of the page. I’d like to hear your thoughts.
Until next time.
Amazon and the Amazon logo are trademarks of Amazon.com, Inc, or its affiliates.


