As an Amazon Associate I earn from qualifying purchases.
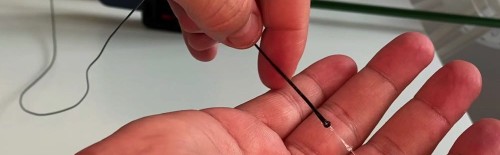
I keep a spool of practice cord in my truck for one reason: the Slim Beauty. Every time I add a new angler to a tarpon trip, I hand them the cord before we ever rig a rod. Tie it ten times on dry ground and you’ll tie it right on the water when a school is moving through. Skimp on practice and you’ll be retying in front of fish.
The Slim Beauty connects two lines of different diameters, and it does it with a slimmer profile than any other knot in that role. For class tippet to bite tippet, for mono to braid, for any leader junction where you need near-100% strength in a compact, low-profile finish, this is the knot.
Below you get the full step-by-step, a few tightening tips from guides who tie it hundreds of times a season, and the comparison table that shows when to reach for it instead of the alternatives.
Quick Answer: Tie a double overhand in your lighter line and collapse it into a figure eight. Thread a doubled bight of the heavier line through both loops, wrap four times down the lighter line, then three times back up. Lock through the first gap, wet the knot, tighten the figure eight first, then pull both lines together firmly. Trim the tag ends.
What the Slim Beauty Knot Is (and Why It Exists)
Simon Becker, a tarpon guide out of the lower Florida Keys, refined this knot in 1993. He needed a way to join his class tippet to a heavy bite tippet without tying Bimini Twists hundreds of times a season. His hands were giving out. The Slim Beauty was his solution.
The concept traces back further, to Captain Tom Pierce in Key West, who first combined a figure-eight knot with a clinch-style wrap. Becker cleaned it up, landed on the wrap count that held at tarpon strength, and the knot spread through the Keys guide community from there.
What separates it from every other line-to-line connection is the figure-eight anchor. You tie a double overhand in one line and collapse it into two stacked loops. The other line gets doubled and threaded through both loops before wrapping. No other common fishing knot uses that structure, which is why it holds so well across such different line diameters.
You can find the full fly fishing knots guide on this site if you want context on where the Slim Beauty fits in a complete leader system.
When Fly Fishers Reach for This Knot
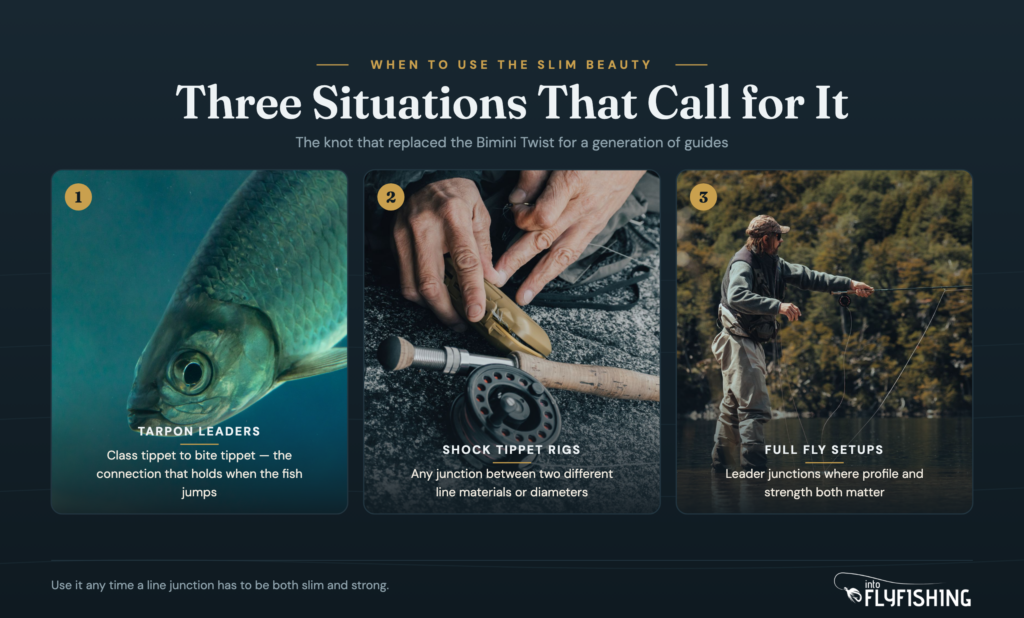
Three situations call for it.
The first is the tarpon leader junction: class tippet (usually 16 to 25 lb) joined to a heavy bite tippet (40 to 80 lb). The Slim Beauty keeps that connection slim enough to pass through your rod guides without snagging, and strong enough that the tippet is the weak link, not the knot.
The second is shock tippet connections in any saltwater situation where you need a short length of heavier mono in front of the fly. The slim finished profile matters because it reduces drag and debris pickup in the current.
The third is braid to mono. If you’re running braid on a spinning setup with a monofilament leader, the Slim Beauty is one of the strongest and most reliable options for that junction, far more so than an Albright or a simple Surgeon’s. The leader and tippet system article explains how these junctions fit into the full rig.
It’s not a hook-attachment knot. Don’t use it for fly to tippet, use an Orvis knot or a clinch for that. The Slim Beauty is strictly a line-to-line connector. If you’re building out a full setup, the best fly lines guide covers the floating and sinking systems that pair with different leader configurations and tippet weights.
What You Need to Tie It
Two pieces of line with noticeably different diameters. The lighter one gets the figure eight, the heavier one gets doubled and wrapped. Beyond that you need very little.
- Your lighter line (class tippet or main line) and heavier line (bite tippet or leader)
- Lip balm or Chap-Stick for lubrication on heavier lines (saliva works fine for lines under 30 lb)
- Nippers or scissors for trimming
- Practice cord while you’re learning it (550 paracord is the right thickness to get a feel for the wraps)
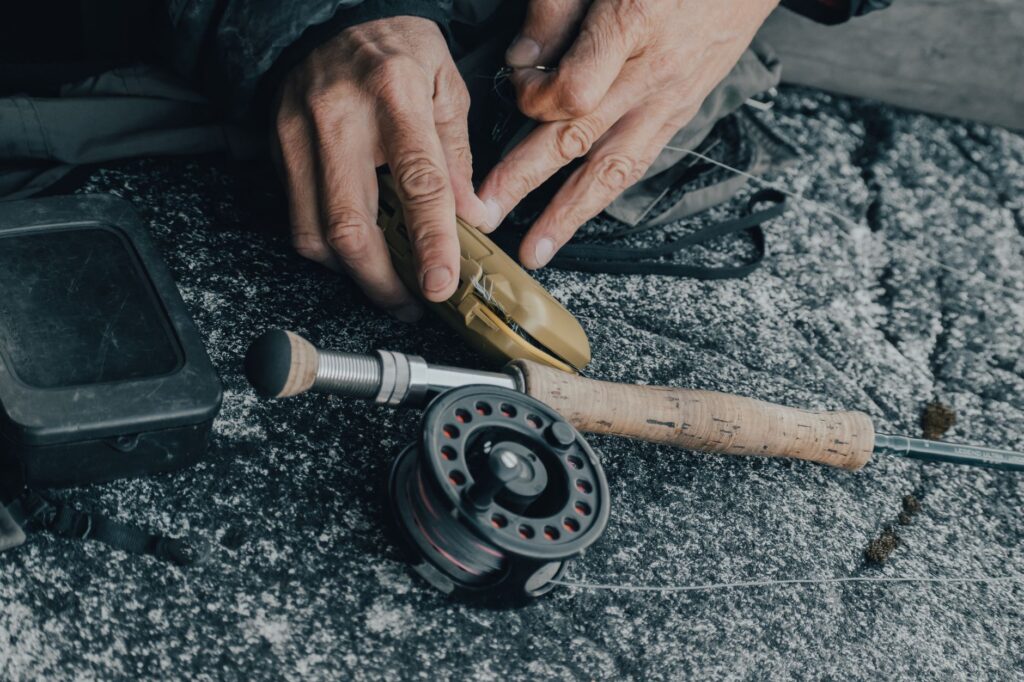
You don’t need any tools to tie this knot, but a set of nippers will save your teeth on heavy bite tippet material. Trim as close as you can without nicking the standing line.
How to Tie the Slim Beauty Knot, Step by Step
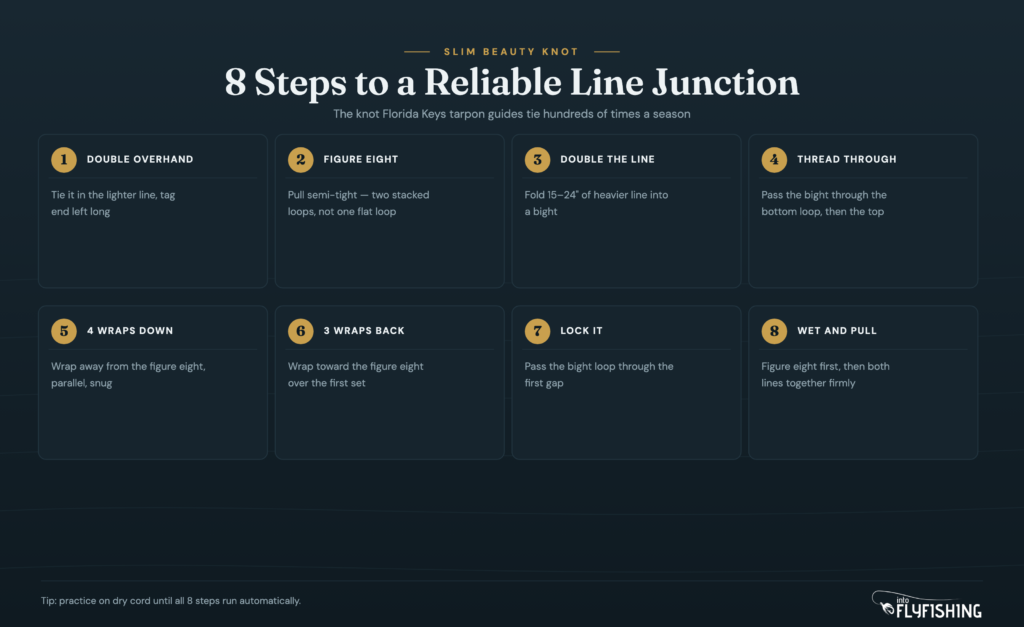
Work through these slowly on your first few attempts. The figure-eight step is the one that trips most anglers up, so go back and check that yours is actually a figure eight, not two separate loops, before you start wrapping.
Step 1: Tie the Double Overhand in the Lighter Line
Take the end of your lighter line and tie a standard double overhand knot. This is the same knot as a regular overhand, except you pass the tag end through the loop twice instead of once before you tighten it. Leave about six inches of tag end to work with.
Don’t tighten it all the way down yet. You want it snug but not cinched, so the knot is still movable.
Step 2: Collapse It into a Figure Eight
Hold the knot between two fingers and slowly pull the tag end and standing part in opposite directions, just enough so the knot tightens from a loose loop into two distinct stacked loops. You’re looking for a figure-eight shape, two loops sitting one behind the other. This is the anchor the whole knot depends on.
If it collapses flat into a single closed loop, you pulled too hard. Back off and reset. A proper figure eight has visible separation between the top and bottom loops when you hold it up to the light.
Step 3: Double the Heavier Line
Pull about 15 to 24 inches of the heavier line back on itself to create a doubled bight. Pinch the fold so it stays even. The two strands of this bight are what you’ll thread and wrap, so keep them together and parallel throughout.
Step 4: Thread the Bight Through Both Loops
Pass the folded bight through the bottom loop of the figure eight first, then through the top loop. Both loops, in sequence, from the same direction. The bight now runs through the heart of the figure-eight knot with equal purchase on both sides.
This is what makes the Slim Beauty different from a Surgeon’s knot. You’re not just overlapping lines. The figure eight grips the bight from two angles, which is where the strength comes from.
Step 5: Wrap Down the Lighter Line (4 Turns)
Hold the figure eight tight with one hand. With the other, wrap the doubled bight around the lighter line four times, moving away from the figure-eight knot with each wrap. Keep the wraps snug and parallel. Sloppy or crossed wraps will kill the knot’s strength.
Four wraps is the standard for lines in the 12 to 25 lb range. You can use three wraps if you’re working with very light tippet or two very different diameters. For heavier lines, five wraps gives you more bite.
Step 6: Wrap Back Up Toward the Figure Eight (3 Turns)
Now wrap the bight back in the opposite direction, three turns toward the figure-eight knot. These wraps go over the previous ones. You’re building a compact barrel with the turns crossing each other, which locks the whole thing in place once you cinch it.
Stop when you’re one wrap back from the first gap between the original wraps. You need that gap open for the next step.
Step 7: Lock Through the First Gap
Pass the loop of the doubled bight through the first gap between the wraps, the gap closest to the figure-eight knot. This is the locking step. Without it the wraps can slip under pressure, and the knot falls apart.
Make sure the loop goes through cleanly and the two strands of the bight stay parallel. Pull it snug by hand before you move to tightening.
Step 8: Lubricate, Tighten, and Trim
Wet the knot with saliva, or work a small amount of lip balm into it if you’re tying heavier than 30 lb. Lubrication lets the wraps seat against each other instead of gripping and distorting.
Tighten in two stages. First, pull the tag end of the lighter line to set the figure-eight knot. You’ll feel it close and seat into the wraps. Then take the lighter line in one hand and the doubled heavier line in the other, and pull both firmly and steadily. On heavy bite tippet, you’ll need real force. If you’re new to it, tightening the knot over your thigh instead of in the air gives you more torque.
Trim the loop end of the heavier line and the tag end of the lighter line close to the knot. Both ends should sit flush. Any stub of loop left sticking out will catch debris in the current.
Tightening Tips From Guides Who Tie This Every Day
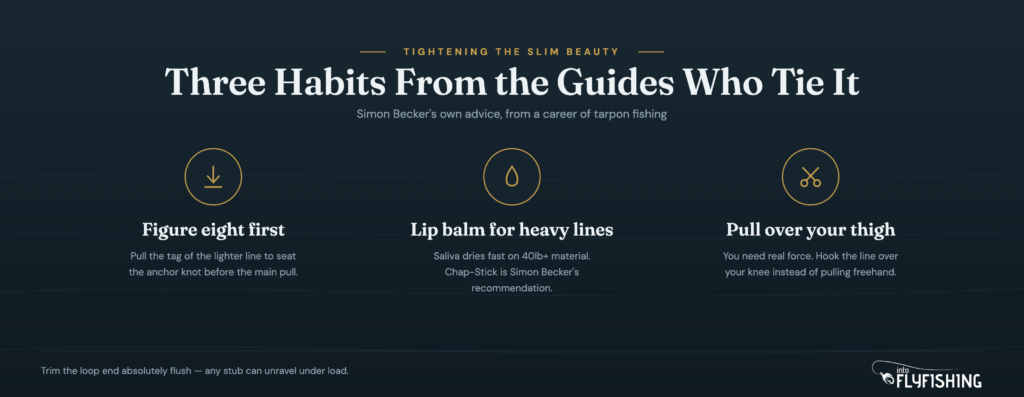
The figure-eight seats first. This is not optional. If you skip straight to pulling both lines simultaneously, the figure-eight knot shifts under load and the whole structure fails. Set it separately, feel it lock, then do the main pull.
Use lip balm on anything over 30 lb. Simon Becker, who developed this knot for Florida Keys tarpon fishing, recommends Chap-Stick specifically. Saliva dries out too fast when you’re working stiff bite tippet material, and the friction tears the wraps before they seat.
Tighten over your thigh, not in the air. You need real pressure on heavy mono, and trying to hold both lines freehand rarely gives you enough torque. Hook the line over your knee and pull. Guides who tie this knot hundreds of times a season all do it this way.
Trim the loop end absolutely flush. Any stub of doubled line left poking out of the wraps can unravel under repeated stress. Nip it right to the knot, not an inch away from it.
Common Mistakes That Kill the Knot
Pulling the figure eight too tight before threading. If the figure eight closes completely before you thread the doubled bight, you can’t get it through both loops. Reset by loosening it from the tag end side.
Threading through only one loop. Check again that your bight passed through both the top and bottom of the figure eight. Threading only one loop cuts the strength roughly in half and the knot seats off-center.
Crossed or bunched wraps. Each wrap should lie parallel to the others. If they cross or stack unevenly, the barrel won’t seat evenly when you tighten and the knot loses strength. Slow down on the wrapping and keep the bight under consistent tension.
Skipping the lock step. The loop-through-the-gap lock is what holds everything together. Forget it and you have wraps with nothing stopping them from sliding under load.
Tightening too fast. A quick jerk seats the wraps unevenly. A slow, steady pull lets them compress together the right way. This is especially true on heavy bite tippet material where the mono has real stiffness to it.
Slim Beauty vs. Surgeon’s Knot vs. Bimini Twist
Three knots compete for the same job. Here’s the real picture.
The Surgeon’s knot is faster and works fine for tippet-to-leader connections in standard freshwater fly fishing. It’s not the right call for big diameter differences or when you need a truly slim profile. It also gives you visual confirmation that you tied it wrong only after it fails; the Slim Beauty’s figure eight shows you immediately if you misthreaded it.
The Bimini Twist is stronger on paper but it requires a doubled main line and a lot more time. Guides who used to tie it for every tarpon connection switched to the Slim Beauty because they can tie it faster in the field without sacrificing meaningful strength. Becker made that call himself after too many sore fingers.
The Slim Beauty is the right call when you’re connecting lines of significantly different diameters and you need a slim, strong finish. It’s harder to tie than a Surgeon’s and easier than a Bimini Twist. The strength approaches 100% of the lighter line’s breaking strain, which is the relevant number when you’re targeting fish that test every junction in the system.
If you need a strong hook-attachment knot, the Palomar knot is the one to know. The Slim Beauty doesn’t serve that role.
| Knot | Strength | Profile | Difficulty | Best for |
|---|---|---|---|---|
| Slim Beauty | Approaches 100% | Slim, low-profile | Moderate | Dissimilar diameters, tarpon leaders |
| Surgeon’s Knot | Good (~80-90%) | Moderate bulk | Easy | Standard tippet-to-leader, freshwater |
| Bimini Twist | 100% (doubled line) | Bulkier | Hard | Offshore, maximum strength, heavy gear |
Frequently Asked Questions
It connects two lines of different diameters at leader junctions. In fly fishing the primary use is class tippet to bite tippet in tarpon and saltwater rigs, where the junction needs to be slim enough to pass through rod guides cleanly. It also works for mono-to-braid connections on spinning gear.
When tied correctly it approaches 100% of the lighter line’s breaking strength. The weak link in the system is the lighter line itself, not the knot. That’s the benchmark for a good line-to-line connector and the Slim Beauty meets it.
Structure. The Surgeon’s knot overlaps both lines and passes them through a loop together. The Slim Beauty uses a figure-eight anchor in the lighter line, then threads the heavier doubled line through both loops before wrapping. The Slim Beauty is stronger across large diameter differences and has a slimmer finished profile.
The standard is four wraps away from the figure eight and three wraps back toward it. For very light tippets you can use three and two. For heavier lines over 40 lb, five and four gives you more bite. Simon Becker’s original uses three away and two back for 25 lb class to 60 lb bite tippet.
No harder than a blood knot, and easier than a Bimini Twist. The figure-eight step is the one that takes some practice because you need to pull it semi-tight without collapsing it flat. Ten practice ties on dry cord in normal light will get you to the point where you can tie it reliably on the water.
Get It Right Before You Go
The Slim Beauty takes a few tries to get right. After that it becomes automatic. The figure-eight anchor is the whole game. Get that right and the rest follows. Get it wrong and no amount of careful wrapping will save you.
Practice it on the spool of cord before you need it on the water. Tie it ten times until the steps run in order without you thinking about them. Then check out the perfection loop for your butt section connection and the full knots guide for every other junction in your rig.
Amazon and the Amazon logo are trademarks of Amazon.com, Inc, or its affiliates.
As a part of the Amazon Associates Program and other affiliate programs, Into Fly Fishing® may receive a comission if you order products through links on this website.