As an Amazon Associate I earn from qualifying purchases.
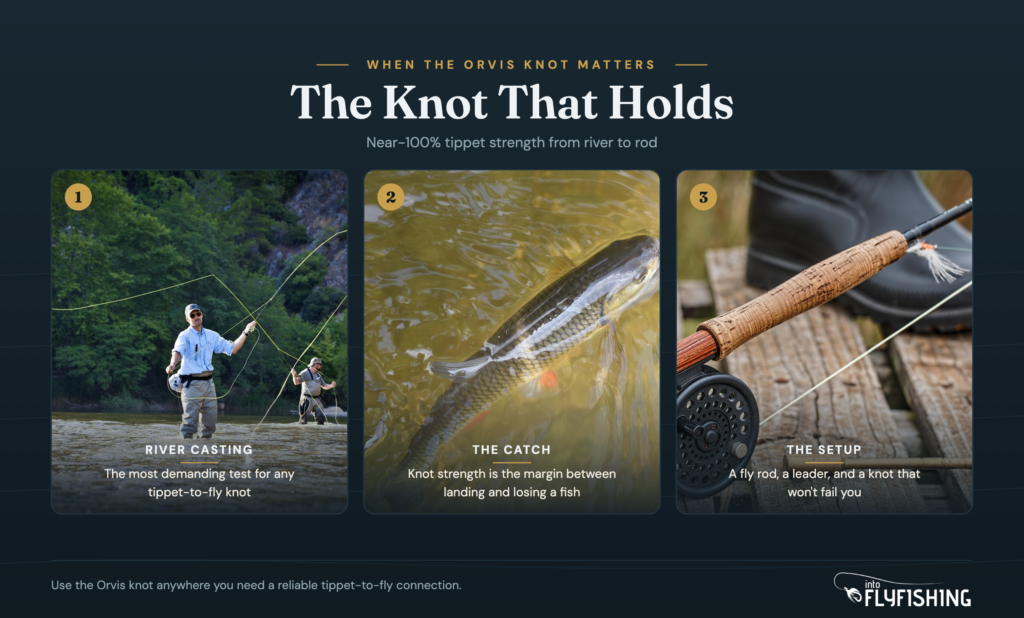
The Orvis knot is the tippet-to-fly connection I come back to when I need something that won’t let me down on big fish. It tests close to 100 percent of tippet breaking strength, sits flush against the hook eye, and can actually be untied by pulling the tag end if you want to swap flies without cutting. That last part alone makes it worth learning.
I fish a lot of technical dry fly water, where I’m regularly swapping patterns every 20 minutes. This knot handles that without burning through tippet. Once you practice it a few times at the kitchen table, you can tie it streamside in under 30 seconds.
Quick Answer: The Orvis knot is a 5-step tippet-to-fly connection that tests at near-100% breaking strength and releases cleanly when you pull the tag end. Thread the tippet up through the hook eye, bring the tag end around the standing line and back through the first loop to form a figure eight, then take two turns around the second loop. Wet it and close it in two pulls. Takes about 20 seconds after a few practice runs.
What Is the Orvis Knot?
The Orvis knot is a terminal connection used to attach tippet directly to a fly hook. It’s a variant of the clinch-style loop knot family, originally published by Orvis and now one of the most-tested fly knots in the sport.
What sets it apart from a standard improved clinch knot is the figure eight at its core. Instead of spinning a row of wraps down the standing line, you bring the tag end around the standing line and back through the first loop, which leaves a figure eight with two openings. The two turns then go around the second opening.
The result is a compact knot that seats square against the hook eye and backs out again when you pull the tag end.

Strength tests consistently put it between 95 and 100 percent. That means the tippet typically breaks somewhere other than the knot, which is exactly what you want when a fish makes a hard run.
When to Use the Orvis Knot
The Orvis knot works for any tippet-to-fly connection. I use it most often with light tippet in sizes 4X through 7X, where knot strength matters the most. On fine tippet, a poor knot will be the weak point every time.
It also works well in these situations:
- Dry fly fishing, where you’re changing flies frequently and want a knot that doesn’t require cutting each time
- Small nymphs and wet flies on fine tippet
- Any setup where you want maximum knot-to-tippet strength ratio
- Cold weather fishing, when numb fingers appreciate a knot that doesn’t require extreme precision
It’s not the best choice for large saltwater hooks with wide-diameter eyes, where a loop knot like the non-slip mono knot gives the fly better action. But for trout fishing with standard dry fly and nymph hooks, this is the most reliable connection I know.
What You’ll Need
You don’t need much to tie this knot. Here’s the short list:
- Tippet material in the appropriate size for your fly (4X for size 12-16, 5X for 16-20, 6X or 7X for flies smaller than 20)
- The fly you’re attaching
- A small pair of nippers to trim the tag end
- Saliva or water to lubricate the knot before cinching
The tippet material you choose affects how this knot performs. Fluorocarbon tippet can be harder to cinch smoothly since it’s stiffer, so take a little extra care wetting it. Nylon tippet ties up more easily and is a good choice if you’re learning the knot for the first time.
If you’re building a full leader system, our best fly lines guide covers the setups that pair well with different tippet weights, including how to match your line to the fishing situation.
How to Tie the Orvis Knot: Step-by-Step
Work through these steps slowly the first few times. After a dozen repetitions, the motion becomes automatic.
Step 1: Thread the Tippet Through the Hook Eye
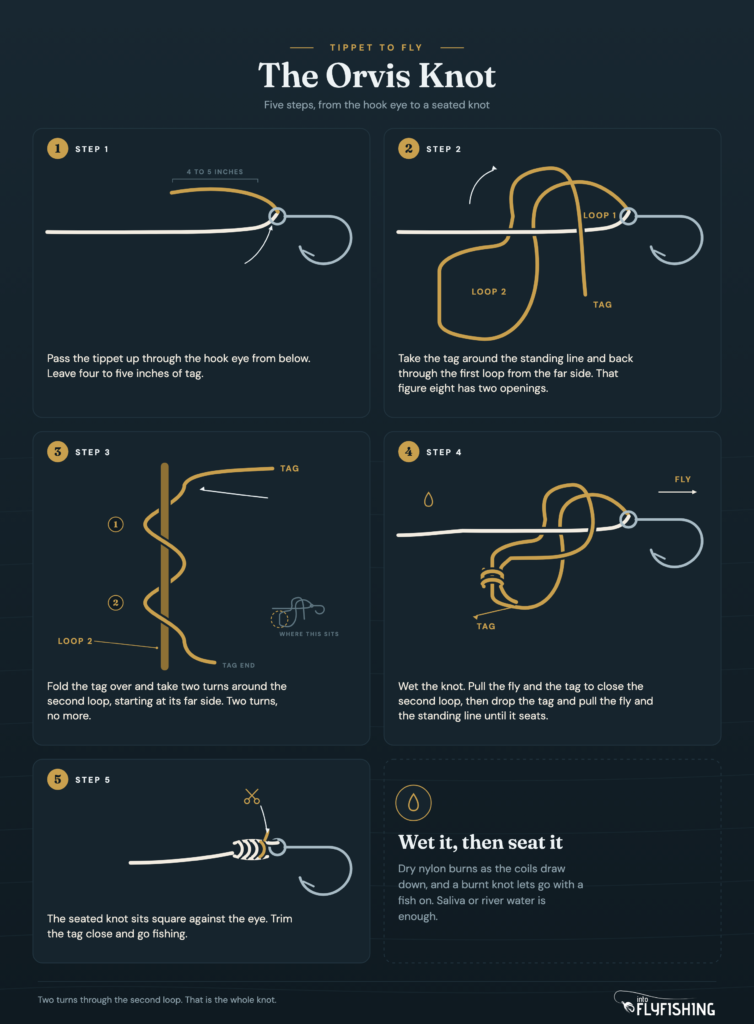
Pull about 6 inches of tippet off your spool. This gives you enough tag end to work with without wasting material.
Thread the tippet through the hook eye from underneath, pushing the tag end from the bottom of the eye up and through. You want 4 to 5 inches of tag end on the far side of the eye when you’re done.
Step 2: Form the Figure Eight
Bring the tag end around the standing line, then feed it back through the first loop, entering that loop from the far side. The first loop is the small opening between the hook eye and the point where the tag crosses the standing line.
What you have now is a figure eight lying against the hook eye, with two openings. The first sits next to the eye. The second is the one the tag just came out of. That second opening is where the next step happens, so keep it open.
Pinch the whole shape between your thumb and forefinger so it holds while you work. If the figure eight collapses, back the tag out and form it again.
Step 3: Take Two Turns Around the Second Loop
Fold the tag end over and take it around the second loop, starting at the far side of that loop. Go around it twice.
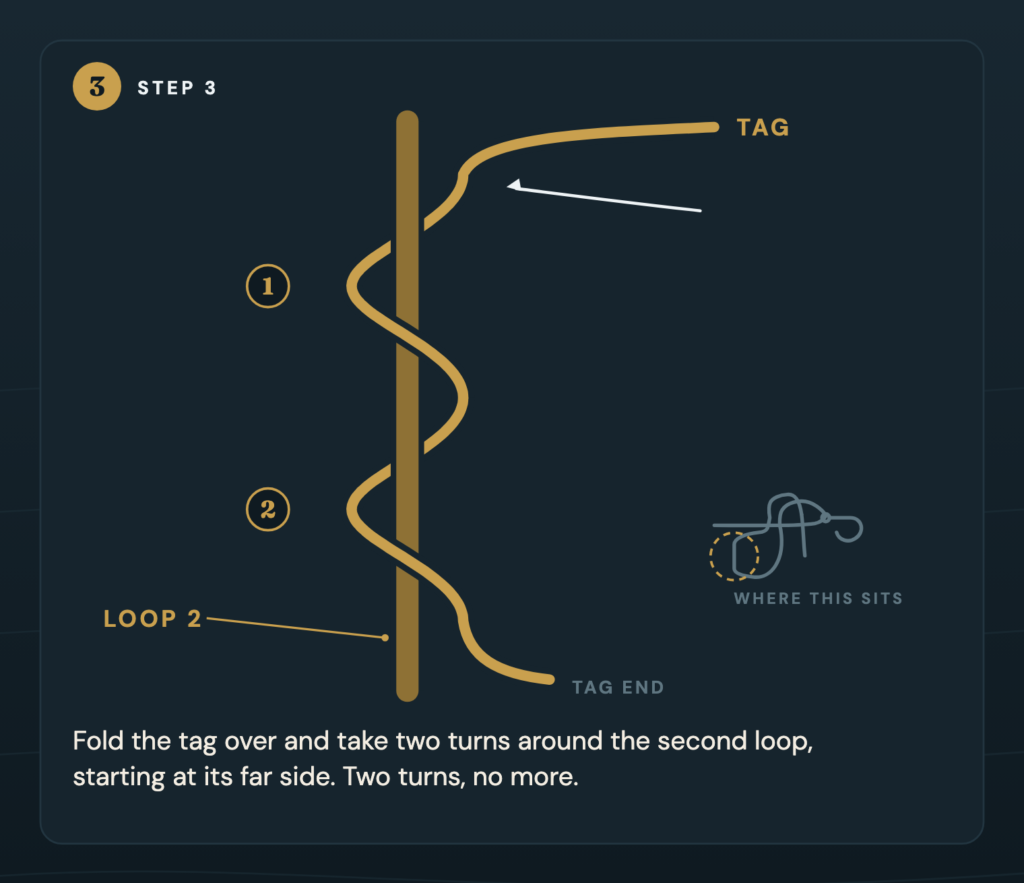
Keep the tag end under light tension as you go so the figure eight holds its shape. The two turns should lie side by side against each other, not crossed. If they cross, back the tag out and take them again.
Two is the count. Orvis publishes two turns, not three. If you catch yourself reaching for a third, you have slipped into a different knot.
Step 4: Wet the Knot
Before you pull anything tight, wet the entire knot. Saliva works fine. Water from the river works too.
Skip this step and the knot can look perfect and still fail under pressure. Dry monofilament generates friction heat when the knot cinches, and that heat weakens the tippet right at the knot. Wet it, and the material slides into place instead of burning.
Step 5: Cinch and Trim
This knot closes in two pulls, and the order matters. First, hold the fly and the tag end together and draw them away from the standing line. That closes the second loop down against the standing part.
Now let go of the tag end. Hold the fly, pull the standing line, and the knot slides down and seats against the hook eye. Use a smooth, steady pull rather than a sharp one.
Trim the tag end close, leaving about a millimeter. Too short and it can work loose under pressure; too long and it catches debris.
If the knot looks lumpy or refuses to draw down smoothly, the two turns probably crossed during step 3. Cut it off and retie. A lumpy knot is a weak knot.
Pro Tips for Getting It Right
A few things I’ve learned from tying this knot in the field for years:
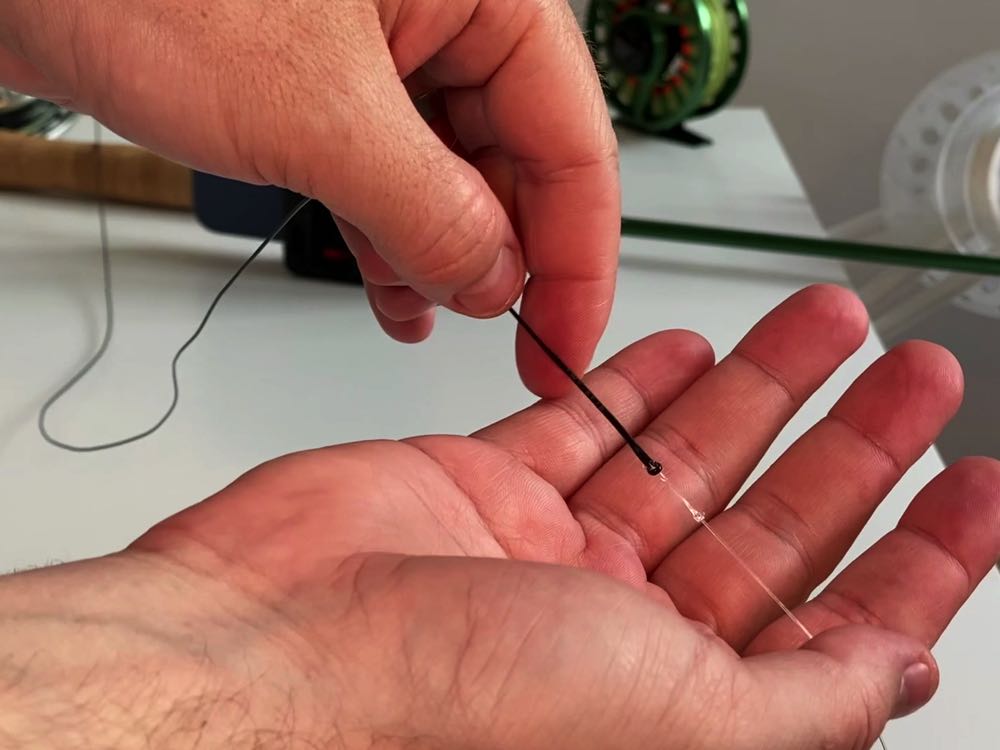
- Practice at home with heavier monofilament before you try it streamside with 6X. The muscle memory transfers but the motions are easier to learn at full scale.
- Count the turns out loud. Two is the number, and in a hurry it is easy to put on a third without noticing.
- If you’re using fluorocarbon tippet, wet the knot twice, not once. Fluorocarbon generates more friction heat than nylon when cinching.
- Pull with a smooth, continuous motion rather than a sharp jerk. A jerky pull puts uneven pressure across the two turns.
- Keep the order of the two closing pulls straight: fly and tag end first to close the second loop, then fly and standing line to seat the knot against the eye.
Orvis Knot vs. Davy Knot
These are the two knots most often compared when the topic is small flies and light tippet. Both are strong and compact. They’re not the same knot, and they have different strengths.
The Davy knot is smaller. It uses a single overhand wrap and finishes in one quick pull, which makes it faster to tie, especially with cold or wet hands. Many competitive fly fishers use it specifically because it’s faster under pressure.
The Orvis knot takes a few more seconds but creates a more symmetrical connection around the hook eye. It’s also reversible, meaning you can untie it by pulling the tag end, which the Davy knot cannot do once cinched.
I prefer the Orvis knot for fine tippet in 6X and 7X because those sizes have less margin for error. The Davy knot is my go-to when speed matters more than anything else, like in competition or when it’s getting dark and I need to make one more change before the hatch is over.
Both test at high strength percentages. The differences between them are mostly practical rather than structural.
| Feature | Orvis Knot | Davy Knot |
|---|---|---|
| Structure | Figure eight, 2 turns | Single wrap through a loop |
| Speed (practiced) | ~20 seconds | ~10 seconds |
| Reversible | Yes | No |
| Best for | Fine tippet, frequent fly changes | Speed-critical situations |
| Knot strength | 95 to 100% | 90 to 95% |
Common Mistakes
The most common errors I see when anglers are learning this knot:
- Not wetting the knot before cinching. This damages the tippet from friction and produces a weak connection even if the knot looks right.
- Three turns instead of two. Usually happens when counting is rushed. The Orvis knot takes two turns around the second loop, no more.
- Closing it in one pull. The second loop has to be drawn shut with the fly and tag end together before you release the tag and pull the standing line.
- Turns that cross each other. The two turns should sit side by side, not twist over each other. Crossed turns create uneven load points and the knot can slip under pressure.
- Cinching with a sharp jerk. A sudden pull can drag one turn over the other instead of compressing them together.
- Trimming the tag end flush. Leave a millimeter. Flush-cut tag ends can work back through the turns on repeated casts.
FAQ
Yes. The Orvis knot tests at 95 to near-100 percent of the tippet’s breaking strength, which means the tippet itself is the weak point in your system, not the knot. If you’re losing fish at the knot, the problem is usually a tying error: skipped wetting, a missed turn, or two turns that crossed.
The Orvis knot forms a figure eight against the hook eye and takes two turns around the second loop. The Davy knot uses a single wrap through a simple overhand loop. The Davy knot is faster to tie. The Orvis knot can be untied by pulling the tag end. Both knots test at high strength. Use the Davy knot when speed is the priority; use the Orvis knot when you want the option to untie and swap flies.
The Orvis knot connects tippet to a fly, not tippet to a leader. To connect tippet to a leader, use a surgeon’s knot or a triple surgeon’s knot. Our leader and tippet guide covers both connections with step-by-step instructions.
The Orvis knot is a good starting point because it’s forgiving, strong, and the steps are consistent every time. If you’re brand new to fly fishing, start with the improved clinch knot first. It has fewer steps. Then move to the Orvis knot once you’re comfortable handling tippet.
The Knot Is Only Part of the Setup
Tie the Orvis knot, and the connection between your tippet and fly is solid. That’s one fewer thing to worry about when a good fish is rising.
The rest of the system still matters: the tippet size needs to match the fly and the conditions, the leader needs to turn over cleanly, and the fly line needs to carry the whole rig to where the fish are. If any part of that chain is wrong, the knot can’t fix it.
For everything else in the system, the full knot library is in our fly fishing knots guide. Every connection from backing to fly, with the same step-by-step approach.
Amazon and the Amazon logo are trademarks of Amazon.com, Inc, or its affiliates.
As a part of the Amazon Associates Program and other affiliate programs, Into Fly Fishing® may receive a comission if you order products through links on this website.