As an Amazon Associate I earn from qualifying purchases.
The Perfection Loop is the knot I tie at the butt end of every leader I build. It takes about 15 seconds once you know the motion, it lays perfectly in line with the standing end, and the loop-to-loop connection it creates lets you swap leaders on the water in under a minute. That matters when conditions change and you don’t want to spend 10 minutes re-rigging.
A lot of anglers stick with the Surgeon’s Loop because it’s faster to remember. The Perfection Loop takes a little longer to learn, but once it’s in your hands you’ll use it every time. The alignment alone is worth the extra practice.
What Is the Perfection Loop?
The Perfection Loop, also called the Angler’s Loop, is a fixed loop knot tied at the end of a leader or tippet. The finished loop lies directly in line with the standing end of the line, which is what makes it different from most other loop knots.
That alignment matters for one specific reason: loop-to-loop connections. When you connect a leader to a fly line using two loops, both loops need to sit straight for the connection to lie flat. A loop that cants even slightly to the side creates a kink, and kinks kill your cast. The alignment comes from how the knot is built: the tag end is passed between the two loops before the inner loop is pulled through, and that threading step is what holds everything in line.
It’s one of the twelve core knots covered in our fly fishing knots guide, and it’s the one I’d put in the top three for trout leaders.
When to Use the Perfection Loop
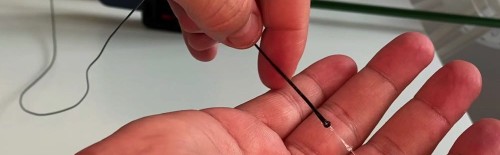
The main use is connecting a tapered leader to the welded loop at the end of a fly line. Fly lines come from the factory with a small welded loop built in; you tie a matching Perfection Loop in the butt end of your leader and the two snap together. Pull the leader off, snap a new one on. No cutting, no re-rigging at the tip.
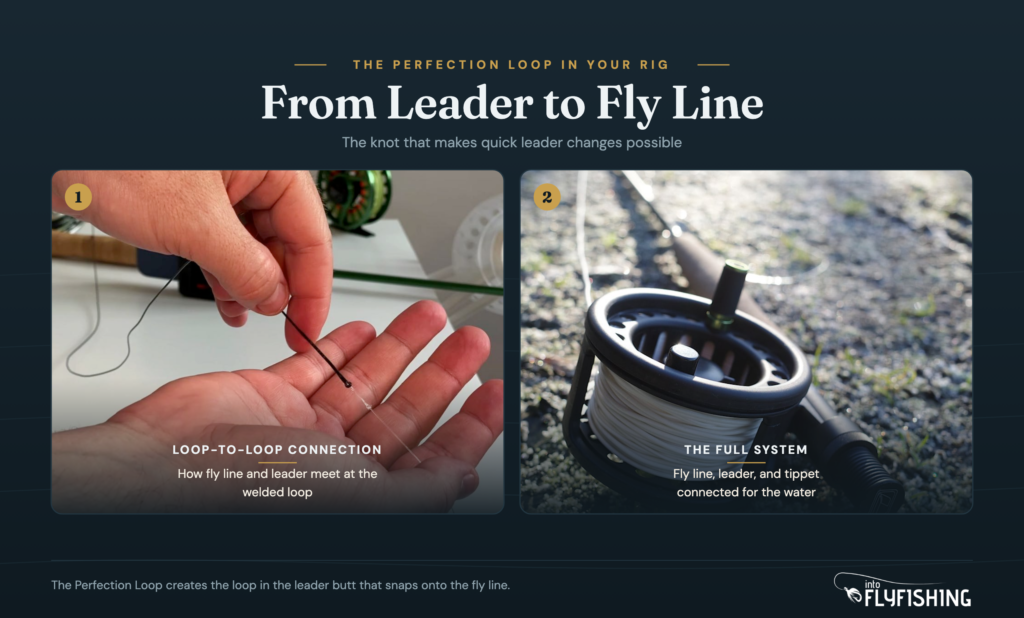
That connection is only as clean as the knot you put in the leader. I’ve seen Surgeon’s Loops pull off-axis and create a visible elbow in the system. The Perfection Loop doesn’t do that.
A secondary use is attaching a streamer directly to the tippet. The loop gives the fly a pivot point so it swings and pulses more freely through the water than a knot tied right to the eye. For articulated patterns and heavier streamers, the difference in movement is worth the extra bulk.
If you’re putting together a complete fly fishing rig from backing to fly, our best fly lines guide covers what lines work for different rod weights and how the whole system connects from reel to fly.
What You’ll Need
The Perfection Loop needs nothing but line and your hands. No tools, no pliers, no threader. A pair of nippers or scissors to trim the tag end at the finish.
- Leader butt section or tippet material
- Nippers or scissors
Monofilament and fluorocarbon both work. I tie this knot most often in hard mono for the butt section of a hand-built leader, where stiffness in the connection helps turnover. Soft tippet material ties the same knot but produces a slightly more flexible loop.
How to Tie the Perfection Loop: Step-by-Step
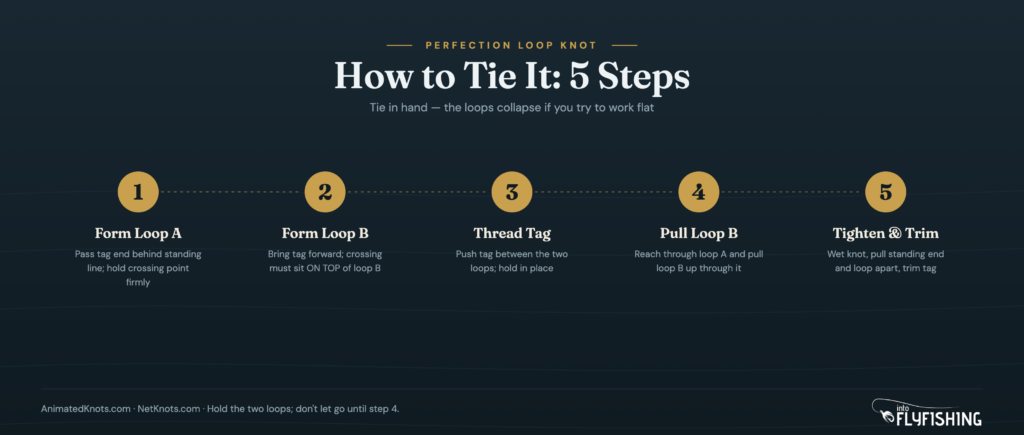
Tie this knot in hand. Hold everything between the thumb and forefinger of your non-dominant hand; that grip is what keeps the loops in place as you build the structure. The knot collapses and tangles if you try to lay it flat on a surface.
Step 1: Form the First Loop
Hold the tag end against the standing line between your thumb and forefinger. Bring the tag end around behind the standing line and hold the crossing point where the two strands overlap. You now have a small loop (loop A) in front of your thumb. Keep that loop held firmly in place.
Step 2: Form the Second Loop
Bring the tag end forward and over the standing line again to create a second loop (loop B) sitting in front of loop A. As you form loop B, the tag end should cross ON TOP of loop B, sitting on the front face of the loop. That crossing position is what most anglers get wrong the first few times, and it determines whether the knot seats correctly.
Step 3: Pass the Tag End Between the Loops
Take the tag end and push it back between loop A and loop B, threading it through the gap between the two loops. The tag end should now be pointing toward you and sitting between the two loops. Hold everything in place with your thumb and forefinger while you move to the next step.
Step 4: Pull the Inner Loop Through
Reach through loop A and grasp loop B. Pull loop B up through loop A. The two loops will nest together and the structure will start to tighten into the shape of the finished knot. You’ll see the two crossings begin to seat against each other.
Step 5: Tighten and Trim
Wet the knot. Pull the standing end and the finished loop in opposite directions simultaneously. The knot will close smoothly and the loop should sit straight in line with the standing end. If the loop cants to one side, the tag end crossed in the wrong direction in step 2. Trim the tag end close to the knot with nippers.
Common Mistakes
The most common error is letting loop B’s tag end cross beneath the loop instead of on top of it in step 2. The knot still closes, but the finished loop sits at an angle instead of in line. If the loop isn’t straight after you tighten, this is the reason.
The second mistake is trying to tie it flat. The whole structure depends on holding the loops in position with your fingers. Without that grip, the loops shift and the threading sequence falls apart.
The third mistake is tightening dry. The knot cinches hard under load, and mono creates heat when it cinches without lubrication. Wet it before you pull, and pull slowly the first time until it’s fully seated. A knot that grabs before it’s in the right position doesn’t seat cleanly.
Perfection Loop vs. Surgeon’s Loop
The Surgeon’s Loop is the easier knot to remember and faster to tie under pressure. You tie a simple overhand loop twice, pull the tag end through, and tighten. Most anglers learn it first.
The difference shows up at the loop-to-loop connection. The Surgeon’s Loop tends to sit slightly off-axis, which can create a small angle at the connection point. Under a good cast it usually straightens out, but on lighter setups with finer leaders it can create a hinge point that costs you turnover.
The Perfection Loop holds straight under the connection and produces a slightly smaller, neater loop that passes through line guides more cleanly. I use the Surgeon’s Loop for quick tippet repairs mid-session when I just need something functional. For the permanent butt end of a hand-tied leader, I always use the Perfection Loop. The leader and tippet breakdown on this site covers the full system if you’re building leaders from scratch.
| Feature | Perfection Loop | Surgeon’s Loop |
|---|---|---|
| Alignment with standing line | In-line (straight) | Slightly off-axis |
| Bulk | Smaller, neater loop | Bulkier loop |
| Speed to tie | Moderate (practice needed) | Fast (easier to remember) |
| Best use | Leader butt end, permanent connections | Quick field repairs |
FAQ
Form loop A by bringing the tag end behind the standing line. Form loop B in front of loop A, with the tag end crossing on top of loop B. Thread the tag end between the two loops. Pull loop B through loop A. Wet the knot, pull the standing end and the finished loop in opposite directions to tighten, and trim the tag end.
Primarily for the loop-to-loop connection between a leader and the welded loop at the tip of a fly line. The Perfection Loop’s in-line alignment keeps that connection straight and flat, which matters for a clean cast. It can also be tied directly to a streamer fly to give the fly more freedom of movement in the water.
Strength isn’t the main difference between these two knots. Both hold reliably for typical fly fishing loads. The Perfection Loop’s advantage is alignment: the finished loop sits straight in line with the standing end, which the Surgeon’s Loop doesn’t always do. That alignment produces a cleaner loop-to-loop connection and better energy transfer through the leader.
The Perfection Loop was designed for monofilament and fluorocarbon leaders. It works on stiffer mono best. For braided line, where slippage is more of a concern under load, most anglers use a different knot at the terminal connection. For the leader butt end in a standard fly fishing setup, mono is what you’ll be working with anyway.
One Knot in a Bigger System
The Perfection Loop handles one connection: the leader to the fly line. Every other connection in the chain has its own right knot. Backing to arbor, fly line to backing, tippet to leader, and tippet to fly are each covered in our fly fishing knots guide.
If you’re connecting tippet to a hook, the Orvis knot or improved clinch are the better fits. For high-strength terminal connections on larger hooks, the Palomar knot is worth learning. The Perfection Loop gets you from the fly line to the leader cleanly and quickly. That’s its job, and it’s the best knot in the category for it.
Amazon and the Amazon logo are trademarks of Amazon.com, Inc, or its affiliates.
As a part of the Amazon Associates Program and other affiliate programs, Into Fly Fishing® may receive a comission if you order products through links on this website.