As an Amazon Associate I earn from qualifying purchases.
In this article, I’m going to explain how to set up a fly reel with the backing, fly line and leader. Sometimes when you purchase a new fly reel, it will be preloaded, which means that it comes already spooled with the correct amount of line, leader and backing, but this isn’t always the case.
Sometimes you get an empty fly reel in the mail, along with about 100 yards of backing and 100 feet of fly line.
In this scenario, you’ll need to measure the correct amount of backing on the reel, before reeling on the fly line and leader.

You always have to use the entire 100 foot portion of fly line, but the amount of backing you need to correctly set up your reel will depend on the size of your reel arbor. Because all reels are different, you’ll can either do a bit of guess work, or you can measure it properly and do it right the first time.
As a part of the Amazon Associates Program and other affiliate programs, Into Fly Fishing® may receive a comission if you order products through links on this website.
How Much Backing Do You Need On a Fly Reel?
This is a great question. The answer is… it depends. It depends on the size of your reel arbor and your personal preference, but basically when your reel is fully spooled with the fly line and the backing, you want about a quarter-inch of space between the fly line and the frame of the reel.

This will help ensure that the fly line won’t get caught up in the frame while you’re reeling in a fish and it will give you enough free space in case you accidentally reel in the line without properly balancing it, leaving it clumped up on one side.
If you don’t put enough backing on a fly reel, then not only does it look strange, but the outer circumference of the spooled line will be smaller, meaning that your retrieve rate will be a lot slower.
The key is to measure the exact amount of backing you need before heading out on the water. To do that, you need to do things a little bit backwards.
First you’re going to spool the fly line onto the reel, then you’re going to spool the backing over top of the fly line, stopping when you have a quarter inch between the backing and the frame of the reel, then you’re going to remove all of the line from the reel and spool it back on in the correct order – backing first, then fly line, then leader.
How Do You Tie The Backing To The Fly Line?
The best knot for backing to fly line is a loop-to-loop connection. It’s important that you use the proper knot to tie the fly line to the backing, because it needs to pass through the eyes of the rod easily and not get caught when you’re reeling in, or more importantly, when a fish strikes.

There’s nothing worse than your line breaking and loosing a fish because your knots were too bulky or sloppy and couldn’t pass freely through the eyes of your fly rod.
Most modern-day fly lines come with a pre-welded loop, built into either end of the fly line, making it incredibly easy to do a loop-to-loop connection.
All you have to do is tie a double surgeon’s knot in the backing, pass the backing loop through the fly line loop, then pass the entire fly line spool through the backing loop that you created and pull tight.
If your fly line doesn’t have a pre-welded loop, then how do you tie the backing to the fly line?
In this case, unfortunately, you’ll have to do an Albright knot. An Albright is not a simple knot, but anyone can do it with a bit of practice. Don’t expect to learn it on the first try! Click Here to learn how to tie an Albright knot.
How Do You Tie Leader To Fly Line?
The best knot for tying the fly leader to the fly line is the loop-to-loop connection. Luckily these days tapered leaders and tippets usually also come with a pre-tied knot on one end. This means that you can easily create a loop-to-loop connection between the fly line and the leader.
In one hand, take the looped end of your leader and then pull the entire length of the leader out so that it’s not tangled or knotted.
Then pinch your index finger and your thumb over the line and pull it outward for the entire length of the leader. This will help to straighten it, making it easier for the next steps. If you have a leader straightener in your fly box, you can use that instead.
Once the leader is straight, take the looped end and pass the fly line through the leader loop. Then, create a secondary loop in the leader behind the pre-tied loop.
Now pass that secondary loop through the pre-welded loop in the fly line and pull the tag end of the leader through the loop. Once the leader is pulled all the way through, pull on the fly line and the leader to secure the loop-to-loop connection in place.
If your fly line and leader don’t have pre-welded loops, then how do you tie the backing to the fly line?
In this case, unfortunately, you’ll have to do a nail knot. A nail knot is not a simple knot, but anyone can do it with a bit of practice. Don’t expect to learn it on the first try! Click Here to learn how to tie a nail knot.
What Tools Do You Need To Set Up A Fly Reel?
If you go to your local fly shop, you’ll probably find that they have all sorts of rigs set up for spooling new fly reels. But if you’re travelling, or trying to set up a new fly reel from home, you might not have all of those tools.

If you have a drill, then this process can be a lot quicker. You’ll be able to clip something into the drill that can attach do your reel arbor and spin the line on a lot faster than you could do it manually.
Similarly, when you’re stripping the line off the reel, back onto the plastic spools that they come on, you can attach the drill to the plastic spools and make quick work of it.
But in this tutorial, I’m going to show you how to set up a fly reel with absolutely no tools. Not even scissors!
I ordered a new fly reel to an Airbnb apartment I was staying at while I was travelling, and there were no tools in the apartment. So, I had to set up the fly reel the hard way!
If you have a drill at home, of course you can make use of it, but you really don’t need it. All told, it took me just 25 minutes to fully set up my fly reel with no tools at all.

Let’s Get Started!
How To Set Up A Fly Reel
Here it goes, my easy step-by-step guide to setting up a fly reel with the backing, fly line and leader all measured perfectly. At the end, you want to have a fully spooled reel with about a quarter inch between the fly line and the frame of the reel, ensuring that you’ll be able to easily reel in your line without it catching on the reel frame.
Step 1: Set-Up A Spooling Rig
This doesn’t have to be anything fancy. Just use some hangers or tie a pencil through the hole in the plastic spools that your line and backing came on. Anything that will allow you to reel in the line from the spool freely will do.
I used some rubber tubes that I found lying around. I threaded them through the spools and tucked them into a dresser drawer.

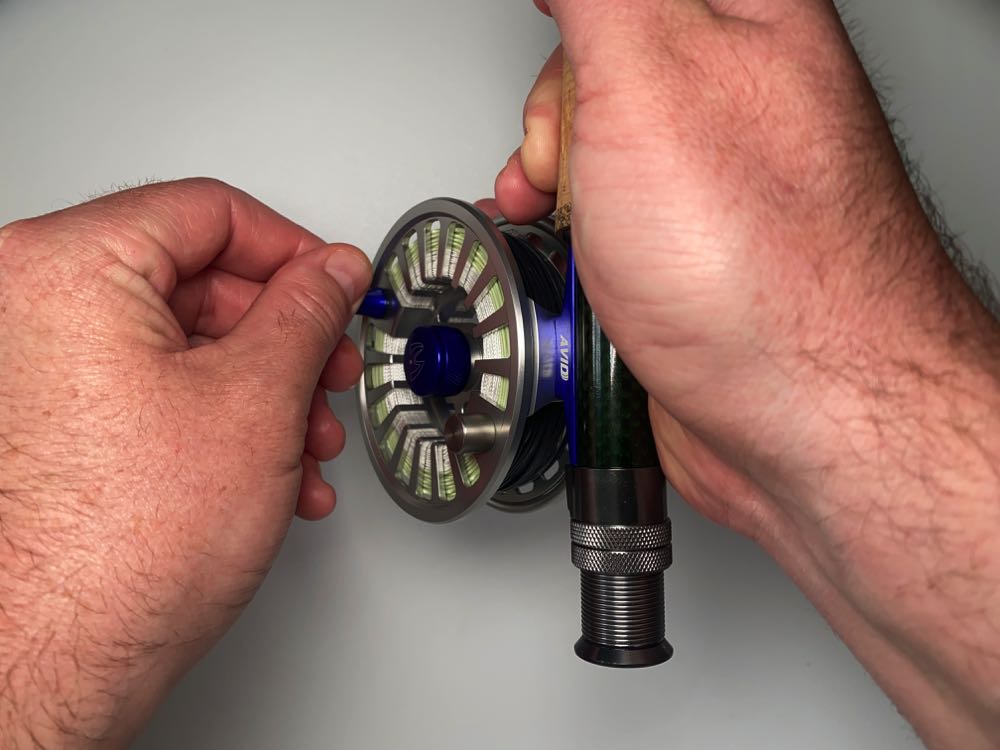
Step 2: Connect Your Reel To The Rod
Hook your reel up to the handle portion of your rod. Of course, you don’t want to set up your entire rod, just have the bottom portion connected to the reel so that you have something to hold on to while you’re reeling in the line and backing.
If you were to have 9 feet of rod in front of you, it would be a little awkward to manage, so just use the handle portion of your rod for this.

Step 3: Check The Reeling Direction
If your rod is normally in your left hand when casting, then you want to set up the reel so that the handle is pointing towards your left hand. Turn the drag to max and reel as you normally would (right-handed casters = counterclockwise).
You should feel no resistance when reeling in, and should feel the drag when spinning in the opposite direction. If not, you’ll have to switch the reeling direction. Check the owner’s manual for the reel or Google it, as all reels are different.
Step 4: Reel On The Fly Line
All fly lines should have a marking or sticker that indicates which end goes into the reel first. This is IMPORTANT! Fly lines are balanced and tapered to ensure the weight of the line is forward, making it easier to cast in tight loops. Keep that sticker in place or remember which side goes to the reel.
Now tape this end directly to the reel spool and reel in the entire length of the fly line to the reel. This is when you can make use of the spooling rig you set up in step 1.
Step 5: Reel The Backing Over The Fly Line
Next you’re going to reel the backing line over top of the fly line. You’re doing this so you can measure exactly how much backing you will need on your particular reel.
Using your spooling rig, reel the backing off of the plastic spool that it came in and onto your fly reel, stoping when there’s about a quarter of an inch between the backing and the reel frame.

Step 6: Unspool The Backing
Now for the fun part. You’re going to have to take all of that backing that you just measured and spool it back onto the plastic spool that it came on. It seems like it will take forever, but this only took me about 7 minutes total.
Loosen the drag on your reel all the way, and start pulling the backing off of it while re-spooling it back onto it’s original spool.

Step 7: Unspool The Fly Line
Now you’re going to do the exact same thing with the fly line. Tie it back around the plastic spool that it came in and begin taking wraps to remove all of the fly line from the reel.
When you’re done unspooling both the fly line and the backing, you can place those plastic spools back into your spooling rig to begin re-spooling them onto the reel in the correct order – backing first, then fly line, then finally the leader.

Step 8: Tie The Backing To The Reel
To tie the backing onto the reel you can just do a simple double or triple surgeon’s knot. This is basically just a noose knot that will tighten as you pull the backing away from the reel.
Pass the backing through the bottom of the reel, then up around the top of the reel close to the reel seat. Then tie your surgeon’s knot around the reel arbour and tighten it to the reel.

Step 9: Reel In The Measured Backing
Now reel in all of the backing that you just measured, but this time be extra careful to keep tension on the line and to evenly distribute it across the reel arbor from left to right as you’re reeling it in.
Don’t use too much tension though as the backing is quite fine and you can easily burn or cut your finger while guiding it into the reel.

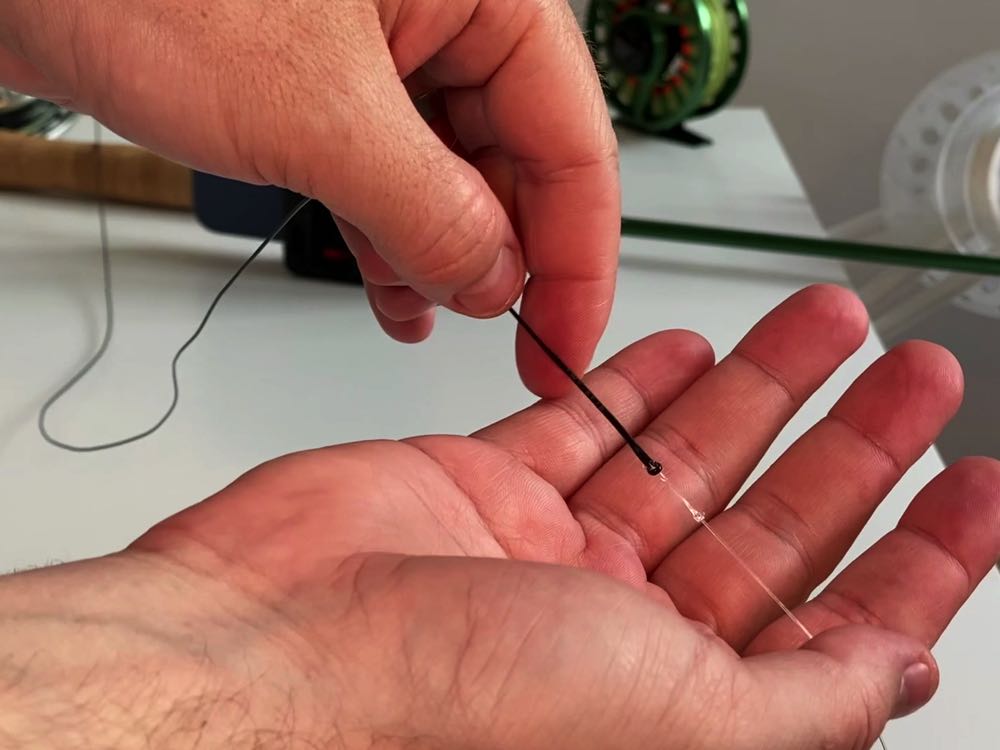
Step 10: Tie The Backing To The Fly Line
Tie a surgeon’s knot into the end of the backing, leaving the loop large enough to pass the entire plastic fly line spool through. Now pass the backing loop through the pre-welded fly line loop and then pass the plastic fly line spool through the loop in the backing.
Slowly pull on the backing and the fly line, guiding the knots to easily pass through the loops finishing with a perfect loop-to-loop connection.

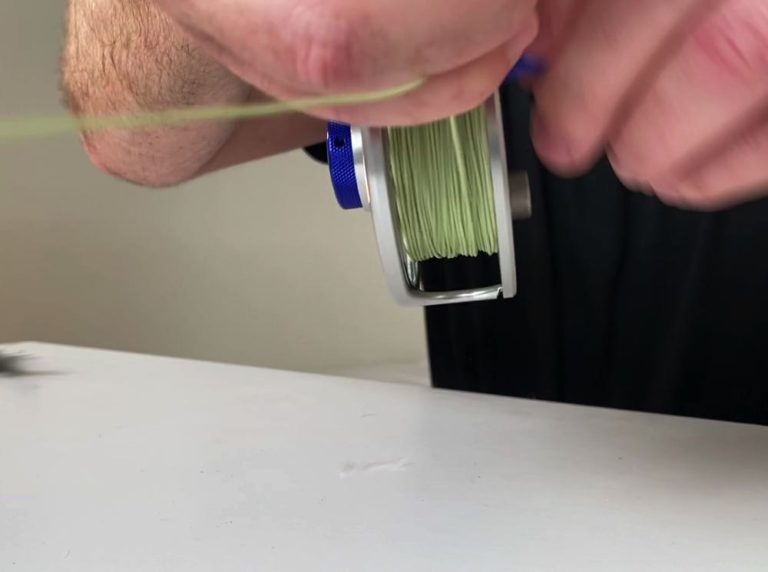
Step 11: Reel In The Fly Line
Again, using the spooling rig you set up in step 1, reel the fly line from the plastic spool it came in, onto your fly reel over top of the backing.
This shouldn’t take more than 2 or 3 minutes and when you’re finished, you should see that your fly line has about a quarter inch of clearance from reel frame, and once all of the fly line is reeled in, you should easily be able to continuously reel without any resistance.
Step 12: Tie The Fly Line To The Leader
These days, most leaders and tippets have pre-tied loops on the thick end. If you purchased a leader without a pre-tied loop, then you’ll have to tie one yourself, or connect it using a nail knot.
Assuming you have a pre-tied loop, pass the fly line through the loop in the leader, then make a secondary loop in the leader and pull that loop through the pre-welded loop in the fly line. Pull the tag end of the leader through and then pull the ends of the fly line and leader to complete the loop-to-loop connection.

Step 13: Reel In The Leader
Now all you have to do is reel in the remaining portion of your leader and fly line and you’re done. Your fly reel should have the backing closest to the arbor, then the fly line and on the outside should be the fly leader, all with about a quarter inch of space between the line and the reel frame.
By measuring it right the first time, you can take the guess work out of setting up a fly reel.

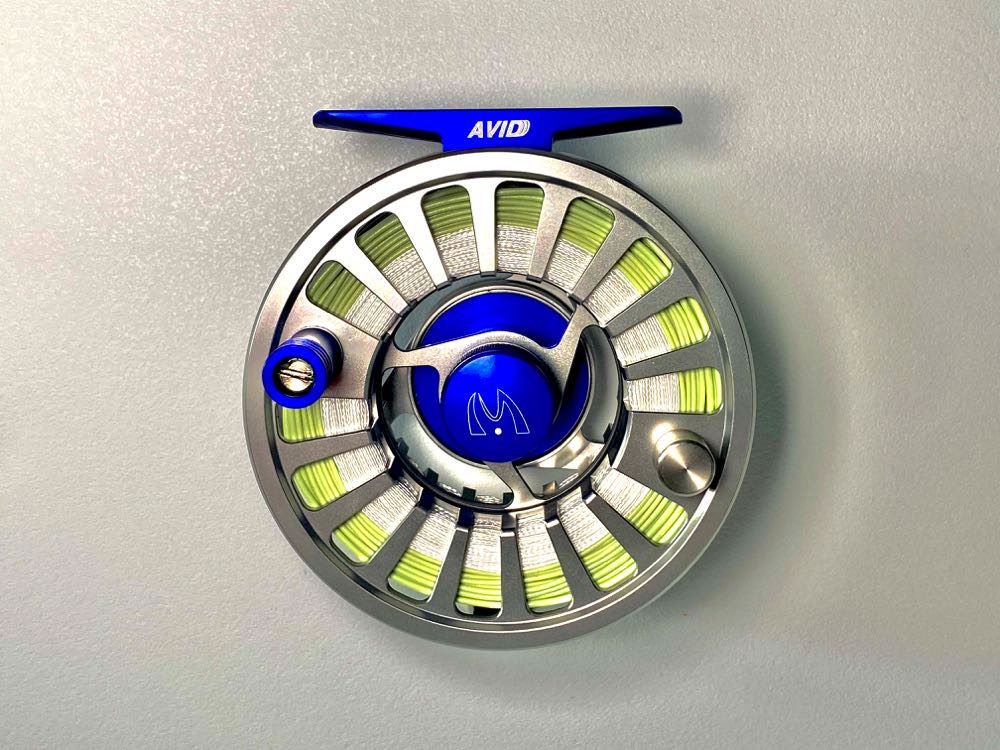
The Completed Reel
Now You Know
How To Set Up A Fly Reel
There are many different ways to set up a fly reel and it’s definitely a lot easier to do when you have some tools in your house, or if you just get the fly shop to do it for you.
But if, like me, you’re stuck at home or in a hotel with no tools and you need to set up a new fly reel with line, backing and leader, I hope this post and the tutorial video helps you out.
If you have any questions about this process, or you just want to connect, feel free to leave a comment below. We love to connect with other anglers!
Like This Article? Pin it!


Amazon and the Amazon logo are trademarks of Amazon.com, Inc, or its affiliates.


