As an Amazon Associate I earn from qualifying purchases.
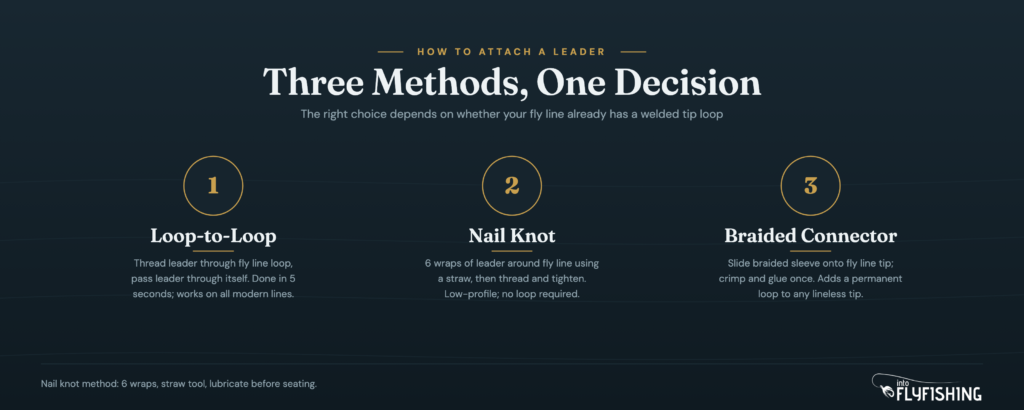
Most fly fishing setups fail at the leader connection, not at the knot below the fly. Get the first junction right and everything else is easier. There are three ways to attach a leader to a fly line, and the one you need depends on whether your fly line already has a welded loop at the tip.
I’ll walk through all three. The loop-to-loop takes about five seconds. The nail knot takes two minutes and a drinking straw. The braided connector sits between them, and it’s the right pick for certain older lines.
- Loop-to-loop: a fly line with a welded tip loop, and a commercial or hand-tied leader with a loop at the butt end
- Nail knot: a drinking straw (or nail knot tool), fly line, and a monofilament leader
- Braided connector: a braided loop sleeve matched to your line weight, UV resin or superglue, and a pair of pliers for the crimp
Check your fly line tip first
Run your fingers to the tip of your fly line before doing anything else. Most lines made in the last ten years have a factory-welded loop right there, a short, stiff loop of coated fly line about half an inch long. If you feel it, you’re set up for the loop-to-loop connection and you can skip the nail knot entirely.
If the tip is cut blunt, or if someone trimmed the old loop off, you’ll use either the nail knot or a braided connector. Both work well. The nail knot is faster if you have the right tool on you. The braided connector is worth it if you want a permanent loop on that line going forward.
For a deeper look at how leaders and tippet are structured, our leaders and tippet explained guide covers the whole system.
Method 1: Loop-to-loop connection
The loop-to-loop is the connection I use on every rod I own. It takes about five seconds, holds with no knot at all, and lets me swap leaders in the field without clipping back into the fly line.
Step-by-step
- Hold the fly line loop in your left hand, opening it into a small oval.
- Push the leader loop through the fly line loop, from the front.
- Pass the entire leader, tippet end first, through the leader loop.
- Pull the leader away from the fly line. The two loops cinch into an interlocked figure-8 shape.
- Seat the connection by pulling both lines away from each other with firm, steady pressure.
No lubricant needed, no trimming. The connection releases just as fast: push the leader loop back through itself and the loops separate cleanly.
Why it works
The connection holds because the loops interlock, not because any knot grips the line. Pulling in opposite directions tightens the interlock rather than stressing it. The one thing to watch is loop size: both loops need to be large enough to pass the other line through without forcing. Factory welded loops and commercial knotted leaders are designed to match, so this is almost never a problem on modern gear.
Because the perfection loop lies perfectly in line with the leader, it’s the standard loop for the leader end of this connection on hand-tied leaders.
Method 2: Nail knot
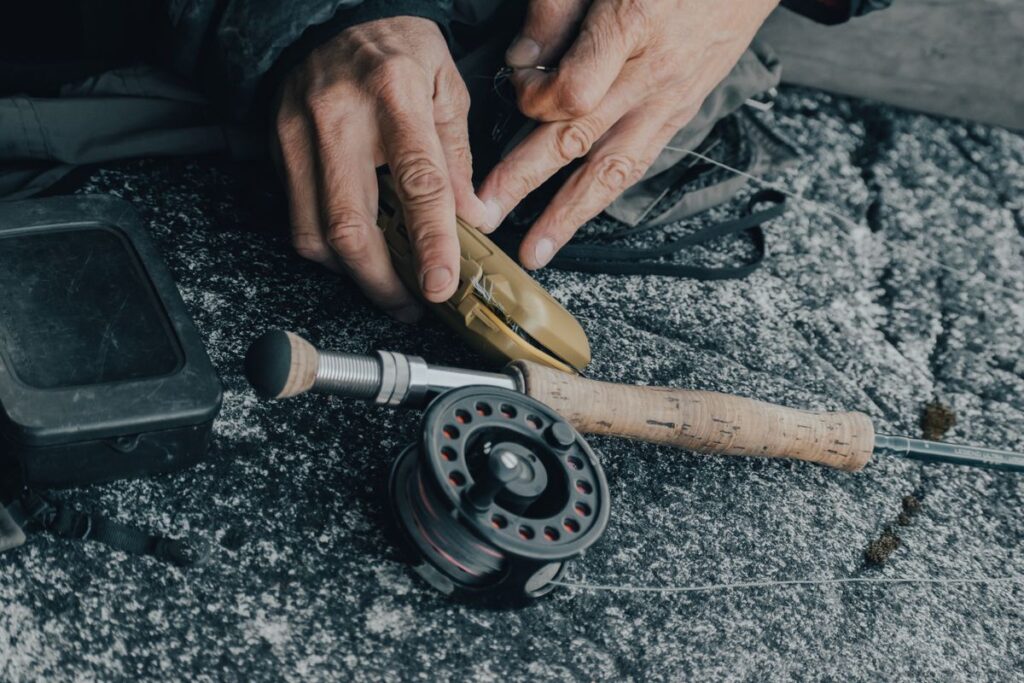
The nail knot predates factory welded loops by decades, and I still reach for it when I’m building up a rod with an older line or when a welded loop cracks mid-season and I need to cut it off. It creates the lowest-profile connection of any attachment method. The wraps grip directly on the fly line coating, and the finished knot slides through rod guides without snagging.
Step-by-step
You need a drinking straw or a nail knot tool. The straw method works anywhere.
- Lay the leader butt alongside the fly line tip, overlapping about 6 inches. Hold a drinking straw against both lines.
- Pinch all three together: leader, straw, and fly line in your left hand.
- Wrap the leader butt around the straw and fly line 6 complete times, working toward the fly line tip. Hold the wraps in place with your thumb.
- Thread the leader tag end back through the straw, from the direction you wrapped, toward the fly line tip end.
- Pinch the wraps, withdraw the straw slowly, and hold the knot shape together.
- Wet the knot. Pull the standing leader and tag end in opposite directions to seat the wraps. Trim the tag end close.
The knot should sit flush against the fly line. If the wraps bunch or spiral, start over. A poorly seated nail knot will slip under load.
When to use it
The nail knot is the right call when your fly line has no welded loop and you want the cleanest possible connection. It also works for backing to fly line, with the same 6-wrap method. Our complete fly fishing knots guide covers both junctions and every other connection in the rig.
One thing to know before you get on the water: the nail knot permanently attaches the leader to the fly line. You can’t swap leaders without cutting and re-tying. If you fish multiple leader lengths or weights in a day, the loop-to-loop is worth the extra step of adding a braided connector to your line. Below the leader, the blood knot vs. surgeon’s knot comparison covers your best options for joining tippet sections.
Method 3: Braided loop connector
A braided loop connector is a short sleeve of braided nylon with a pre-formed loop at one end. You thread the fly line tip into the open end, push it in about an inch, and a metal crimp sleeve closes the back end permanently. No knot touches the fly line itself.
I use these on older lines that came without factory loops and on spare spools where I want the same quick-change setup as my main rod. The braided connector adds a welded-loop equivalent to those lines, without tying any knot on the fly line itself. It also preserves the fly line coating better than the nail knot, since no wraps compress the outer layer.
The trade-off is setup time. You need UV resin or superglue along with the crimp, and you should let it cure fully before fishing. The connection is permanent, so if the braided sleeve fails, you’re cutting it off and re-doing it. That said, a properly installed braided connector lasts for seasons without any attention.
Brands like RIO and Cortland sell these in packs. Match the sleeve diameter to your fly line weight. If it slides on too easily or won’t grip, you have the wrong size.
Which method should you use?
If your fly line has a welded tip loop: use the loop-to-loop connection. There’s no reason to do anything else. It’s faster, it’s just as strong, and it lets you swap leaders in under a minute.
If your fly line has no loop and you just need to get fishing: tie a nail knot. It takes two minutes and a straw, and the connection will outlast the leader.
If your fly line has no loop and you fish it regularly: install a braided loop connector. You do it once and the line becomes a quick-change setup for the rest of its life.
| Method | Lines with welded loop? | Tools needed | Speed | Leader swappable? |
|---|---|---|---|---|
| Loop-to-loop | Yes | None | 5 seconds | Yes |
| Nail knot | No | Straw or nail tool | 2 minutes | No |
| Braided connector | No (installs one) | Crimp + glue/UV resin | 10 min (once) | Yes (after install) |
The fly line itself matters here too. A good line with a clean tip loop makes this whole process easier. Our team’s pick is in our best fly lines roundup if you’re due for an upgrade.
Common mistakes
The most common issue I see is a loose loop-to-loop connection. People push the leader loop through the fly line loop and then just pull the tippet end. The trick is to pass the entire leader through, including the butt section, so the leader’s own loop is what cinches around the fly line loop. If you pull only the tippet, the connection looks seated but will slip.
With the nail knot, under-wrapping is the usual problem. Five wraps instead of six, or wraps that are too loose before you seat them. Count out loud. Six wraps, firmly touching each other, then tighten in a single steady pull with the line wet.
For the braided connector, the mistake is rushing the cure. UV resin needs a full 30 seconds under the lamp, and superglue needs at least an hour. A connection that isn’t fully cured will pull out under a heavy fish or a snagged cast.
All three methods benefit from a quick tug test before you make your first cast. If anything slips more than a millimeter, redo it on the bank rather than in the water.
FAQ
The loop-to-loop connection is the best method on modern fly lines because it requires no knot at all. The two loops interlock and hold securely. If your fly line has no welded tip loop, the nail knot is the best choice: 6 wraps, seated tight, and it sits flush against the fly line with no profile to snag on guides.
Use a nail knot. Lay the leader butt alongside the fly line tip with a drinking straw against both, wrap the leader 6 times around the straw and fly line, thread the tag end back through the straw, withdraw the straw, wet the wraps, and pull tight. Trim the tag end close when the knot seats flat.
Push the leader loop through the fly line loop from the front. Then pass the entire leader, tippet end first, through the leader loop. Pull the leader away from the fly line, and the loops cinch into an interlocked figure-8. No knot, no tools, and the connection releases in seconds when you need to swap leaders.
Replace the leader when it develops memory coils that won’t straighten, when the butt section thickens from repeated loop-to-loop connections shortening it below 12 inches, or when you see any nicks or abrasion in the monofilament. A good leader fished regularly typically lasts one season before the butt section is too short to form a proper loop.
Final thoughts
Any of these three methods will hold a fish if you execute it right. The loop-to-loop is what I use on every setup I own, and for most people it’s the right default. If your line came without a welded loop, the 10-minute investment to add a braided connector is worth it, and the nail knot will carry you until you can.
Check the connection before every session. A leader that has been loop-to-looped and un-looped a dozen times is still sound, but it takes two seconds to confirm that and it’s not worth guessing at streamside.
For everything connected below the leader, our fly fishing knots PDF has all the tippet and fly connections in a single printable sheet.
Amazon and the Amazon logo are trademarks of Amazon.com, Inc, or its affiliates.
As a part of the Amazon Associates Program and other affiliate programs, Into Fly Fishing® may receive a comission if you order products through links on this website.