As an Amazon Associate I earn from qualifying purchases.
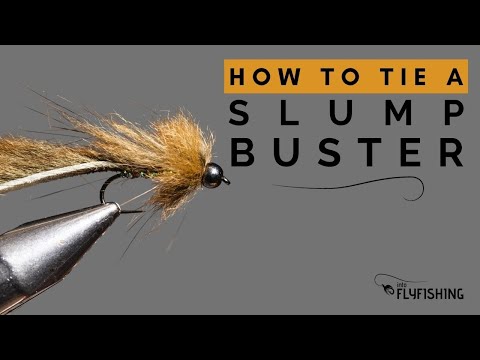
In this step-by-step guide, I’ll show you exactly how to tie the Slump Buster. It’s an excellent baitfish imitation that is used to target species such as bass and trout. I’ve been using the Slump Buster for the last couple of years on both rivers and lakes and can tell you it works like a bomb.
Quick Look
- Difficulty level: Moderate
- Tying time: 10 minutes
- Materials: Hook, bead, pine squirrel zonker, sparkle braid, wire ribbing material
- Hook size: 4–12, 3X or 2X long
What is a Slump Buster?
The Slump Buster is a streamer fly pattern developed by the renowned fly tier John Barr. John is known for his infamous Copper John pattern.

The Slump Buster is very similar, in many ways, to the Bunny Leech, except it makes use of slightly different materials, which gives it a distinct look underwater.
Watch the How to Tie the Slump Buster Video
How to Fish a Slump Buster
The Slump Buster is an excellent fly to target predatory freshwater species with. It may be used on both rivers and lakes and with various fly lines. Let’s look at each scenario in more detail.
Rivers
The first technique I use when fishing the Slump Buster is to work structure. As you all know, predatory fish, such as trout and bass, use structure to hind behind and ambush prey. Structure also allows the fish the expend a lot less energy.
Once you’ve made the cast towards the structure, you must be in immediate contact with your fly. I’ve seen many fish take as the fly lands, and you need control of your line to set the hook.

The other technique I use is to cast the fly across and down and pinch the line so that the fly swings through likely fish-holding water. With this technique, there will be no mistaking a take for something else.
Lakes
On lakes, I fish the Slump Buster the same way I would most other streamers. If the fish are holding deep, use a fast-sinking line to get the fly down to where they are. If the fish are up and feeding below the surface, a floating line works great.
Vary the retrieve until you find something that works. John Barr also likes fishing two different colored and sized Slump Busters at the same time.
Materials You’ll Need to Tie a Slump Buster
You’ll need the following materials to tie a Slump Buster:

Hook
A strong streamer hook with a 2X or 3X long shank will do the trick. I prefer using barbless hooks as they make releasing the fish easy and penetrate deep. Some of my favorite hooks on the market include:
- Umpqua U103
- Hanak H900BL
- TMC 5262
- Partridge Ideal Streamer D4AY
- Mouche 8443
Thread
The zonker material you’ll be working with is quite tough, so you’ll need a thread that is strong enough to synch it down properly. Any thread around 140D will suffice, which will give you enough strength but won’t build up too much bulk, like a 210D would.
Match the color of the thread to that of the fly.
Some of the best thread for the Slump Buster include:
Bead
Most versions, including the original, were tied using a brass cone. I also like tying my Slump Busters with large tungsten beads. Match the cone or bead size to the size and desired weight of the fly.
Zonker
The original pattern calls for a thin pine squirrel zonker strip; the excess material is used for the fly’s collar too. What makes the material different from rabbit zonker is that it has a variation in color, giving the fly a more natural look. You’ll also notice that the hair fibers are much shorter.
By all means, you can tie the fly using a rabbit zonker. The finished fly will be slightly bulkier but will have incredible movement. It will be a Bunny Leech.
Body Material
The fly’s underbody is made from a flashy material called sparkle braid. It’s a body braid that is made from different flash materials. If you don’t have sparkle braid, you can use a flashy chenille or wrap flash around the body.
Ribbing
The ribbing’s primary purpose is to secure the zonker strip that is folded over the body. Any ribbing that matches the fly’s color will suffice, just as long as it’s not too thick.
Tools Needed to Tie a Slump Buster
You’ll need the following tools to tie a Slump Buster:
- Vise (a rotary vise helps)
- Bobbin holder for the thread
- Whip finishing tool to finish the fly
- Scissors
- Hackle plier
- Dubbing loop spinner
- Bodkin
- Paper clamp or Petitjean Magic Tool
Step-by-Step Guide to Tying a Slump Buster
Now we have everything we need to tie a Slump Buster, so let’s get to it.
Slump Buster Recipe
The specific materials I use are:
- Hook: Mouche 8443 size 8
- Thread: Uni Thread 136D Tan
- Bead: Countersunk Tungsten Bead 4.6mm black nickel
- Body: Sparkle Braid peacock color
- Ribbing: Brass Ultra Wire brassie size
- Tail, wing, and collar: Hends muskrat zonker olive
Step 1: Slip the Bead onto the Hook

A countersunk bead has a small hole on one side (front) and a larger hole on the countersunk side.
Slide the small side over the hook point until it hits the hook eye.
Step 2: Secure the Hook in the Vise

Place the bend of the hook between the jaws of your vise and lock it in place. The hook shank must be level, with the hook point and barb area left exposed.
Test to make sure that the hook is seated correctly.
Step 3: Secure the Thread

Hold the tip of the thread with your non-tying hand and place the thread with your bobbin over the top of the shank, leaving about 20% of the shank exposed behind the bead.
Make a couple of wraps forward and then back over the thread to lock it in place. Cut off the excess tag end.
We’ll leave the 20% section open for now. The collar will be tied in this area later on. Leaving the space open (not laying a thread foundation) prevents you from creeping forward as you tie in the material.
Step 4: Lay a Thread Foundation

Spin the thread counterclockwise to open (flatten) the thread. Run the thread back with touching turns until you reach the end of the straight shank.
Step 5: Tie In the Sparkle Braid

Run the thread forward to the start of the thread foundation. Cut off a section of the sparkle braid and tie in with about 1/3 of the shank length braid facing forward.
Hold the rear-facing section you tied in on the side of the shank and secure it with thread back to the bend of the hook. It must be secured on one of the sides of the shank.
Step 6: Fold Over the Sparkle Braid Tag End

Run the thread forward to the tying-in point. Fold the braid’s tag end to the opposite side of the other piece and secure it with thread.
Hold it to the side and run the thread over it. Once you reach about 1/3 of the shank, cut off the excess.
What we have now is a tapered body.
Step 7: Tie In the Ribbing

Run the thread back to the tying-in point and place a piece of ribbing on the top of the shank. Tie it in and secure it back to the bend of the hook. Cut off the excess ribbing that’s facing forward.
Step 8: Tie In the Zonker

Zonker material has a natural lay; in other words, the hair fibers lean in one direction. This direction must be facing backward when tying in the material.
The thread should now be hanging at the back of the shank. Cut a section of pine squirrel zonker and split the fibers so that you can access the leather base. Depending on the hook size, you should have roughly an inch facing forward and backward.
Place the zonker on top of the hook and secure it with thread using two or three pinch wraps. Pull the forward-facing zonker backward and wrap the thread forward to the first tying-in point.
Step 9: Wrap the Body Braid

Pull the rear-facing zonker forward and make one wrap with the body braid behind it. Now, pull the zonker backward and make a tight turn in front of the tying-in point. This procedure secures the zonker material.
Wrap the zonker forward with touching turns and tie off at the initial tying-in point.
Step 10: Fold the Zonker Over

Fold the zonker material over the body and secure it at the tying-in point. Cut off the excess material.
Step 11: Wrap the Ribbing

The first wrap of the ribbing is on the same point where you tied in the zonker material. Then, wrap the ribbing with even spacing over the zonker to secure it to the body. Be careful not to trap any of the zonker hair fibers.
Secure the ribbing once you reach the initial tying-in point and remove the excess.
Step 12: Create a Dubbing Loop

Create a dubbing loop with your thread about 4 inches long and advance the thread behind the bead.
Step 13: Clamp the Zonker

Take a new section of zonker material and stroke back the fibers to be perpendicular to the hide.
Slide a clamp over the fibers and grip them. Cut the fibers against the hide.
Step 14: Spin the Dubbing Loop

Insert the zonker fibers in the dubbing loop. Spin the dubbing loop until it looks like a bottle brush.
Step 15: Palmer the Collar

Grip the dubbing loop with a hackle plier and palmer forward, constantly stroking back the fibers.
The collar pushes up against the beading, holding it in place. Tie off the thread of the dubbing loop and trim off the excess.
Step 16: Finish the Fly

Apply some Sally Hansen Hard as Nails on the tying thread and do two whip finishes. Cut off the thread.
That’s How to Tie a Slump Buster
The Slump Buster might seem a little hard to tie at first, but once you get the hang of it, it’s pretty easy. It’s one of those flies that uses a couple of fundamental techniques, so in that sense, it’s an excellent fly for beginners to learn new methods.
If you found this article interesting, please share it with your fellow anglers and friends. Leave any comments or questions at the bottom of the page.
Until next time.
Amazon and the Amazon logo are trademarks of Amazon.com, Inc, or its affiliates.
As a part of the Amazon Associates Program and other affiliate programs, Into Fly Fishing® may receive a comission if you order products through links on this website.


