As an Amazon Associate I earn from qualifying purchases.
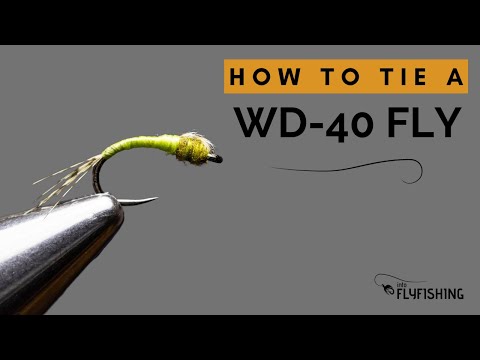
In this fly tying tutorial, I’ll show you how to tie the WD-40. It’s an understated and often overlooked fly. It’s not flashy, and it’s tiny, but I can assure you trout love this fly.
The WD-40 is one of the first flies I always put on my dry-dropper rig when I prospect new rivers or runs. It’s a confidence fly and one I’m happy to share with you.
As a part of the Amazon Associates Program and other affiliate programs, Into Fly Fishing® may receive a comission if you order products through links on this website.
Quick Look
- Difficulty level: Easy
- Tying time: 3-5 minutes
- Materials: Hook, thread, mallard feather, fine dubbing, head cement
- Hook size: 16-22
What Is a WD-40?
The WD-40 is an emerging midge imitation developed in the ’80s by Colorado fly fishing guide Mark Engler.
In my opinion, the fly’s profile lends itself to mimicking various other invertebrates too, like a small mayfly, for instance. Because midges are usually so small, the WD-40 is best tied in sizes ranging from 16 to 22, with the best being 20.

The color of the abdomen and thorax may be varied according to the midges most prevalent in your waters.
Watch The How to Tie a WD-40 Video
How to Fish a WD-40
This fly is most successfully fished in combination with other flies. One of the best ways is to attach the WD-40 on a dropper behind a dry fly. This setup may be used in both lakes and rivers.
The other method that works particularly well is to use the WD-40 in a nymphing rig. If you’re fishing in fast-moving water, consider incorporating an appropriately sized bead into the fly.

This additional weight will allow the fly to sink into the strike zone faster.
Materials You’ll Need to Tie a WD-40
You’ll need the following materials to tie a WD-40:

Hook
Any small curved emerger hook will work. As always, I prefer a barbless hook because it penetrates the fish’s jaw easier, damages their mouths less, and comes out easier when a client accidentally hooks you in the neck.
Some of my favorite hooks for the WD-40 are:
- TMC226BL
- Umpqua XT040
- Mouche 8471
- Gamakatsu C12-BM (for tiny stuff)
Thread
On these small flies, you must make use of a flat-lying thread. This aims to minimize bulk buildup yet have a wide enough thread to create the body. The thread color may be varied to suit the color of the midges in your home waters.

Any one of the following threads will serve you well:
Mallard
A section cut from a mallard feather is used as both the tail and wing case on the fly. You’ll find these dyed in a wide range of colors, so you’ll be able to match the color of the midge you’re imitating.
Head Cement
Any clear drying head cement will suffice as its only purpose is for added durability. I prefer Sally Hansen Hard as Nails.
Tools Needed to Tie a WD-40
You’ll need the following tools to tie a WD-40:

- Vise
- Scissors
- Bobbin holder
- Whip finishing tool
- Bodkin (optional)
Step-by-Step Guide to Tie a WD-40
Let’s jump right into tying the WD-40. Below you’ll find a list of materials I use in the step-by-step tying guide.
WD-40 Recipe
The specific materials I use are:
- Hook: Mouche 8471 size 16 (for illustrative purposes, usually I tie them smaller)
- Thread: Grip 6/0 light olive
- Tail and wing case: Natural colored mallard
- Thorax: Hareline superfine waterproof dry fly dubbing in a brown olive
Step 1: Secure the Hook in the Vise
 Remove a hook from the packet and place the bend between the jaws of the vise. You want the hook eye to be straight to prevent frustration later when whip finishing the fly.
Also, ensure that the hook point and barb (if you’re using a barbed hook) are left exposed.
Lock the hook in place by flipping the cam lever and pull on the hook to ensure it’s secured properly.
Step 2: Attach the Thread
 Hold the tip of the tying thread with your non-tying hand. Place the thread over the hook with the bobbin in your tying hand, approximately ¼ hook shank length behind the eye.
Wrap forward five times and then back the thread over itself. Once locked, trim off the excess tag end.
Step 3: Prepare the Mallard
 Stroke the fibers of a mallard feather until the tips align. Cut a clump off the stem, being careful not to overdress the fly.
Step 4: Tie In the Mallard
 Place the mallard on top of the hook shank with the aligned tips facing rearward. Once tied in, the tail should be approximately ½ hook shank long.
Secure the mallard with two pinch wraps. Don’t cut off the forward-facing part of the mallard.
Step 5: Lay a Thread Foundation
 Wrap the thread back down the shank to tie in the tail while making sure to keep the mallard on top of the hook.
Go down a fair amount of the bend until the tail is long enough.
Step 6: Prepare the Thorax Area
 Open the thread by spinning the bobbin counter-clockwise. Once you see the thread is flat, make neat touching wraps forward until you get to the point where you tied in the mallard feather.
Keep the forward-facing part of the mallard on top of the hook while wrapping forward until you reach the eye.
Step 7: Taper the Body
 Open the thread again and create an even taper for the body. End with the thread just behind the hook eye.
Step 8: Dub the Thorax
 Pull a small amount of dubbing from the dispenser or packet and form a thin and short dubbing noodle on the thread.
Wrap the dubbing rearwards with touching turns until you’ve covered about 1/3 of the total body length.
Step 9: Fold Over the Wing Case
 Pull the forward-facing mallard fibers over the thorax and secure them with the tying thread.
Then, cut off the excess material.
Step 10: Tidy Up
 Before we complete the fly, open the thread one last time and pass over the exposed mallard fibers you just cut off.
Step 11: Whip Finish
 Do a standard whip finish behind the thorax and trim off the thread.
That’s How to Tie a WD-40
I hope that you find the WD-40 as exciting and effective to fish with as I do. As you can see, there are no real hard steps to the fly, with its small size being the most challenging hurdle to cross. Once you get used to it, these flies are quick and straightforward to tie.
Please share this tutorial with your fellow fly tiers and anglers. Also, leave any comments, questions, or suggestions at the bottom of the page.
And as always, see you later.
Amazon and the Amazon logo are trademarks of Amazon.com, Inc, or its affiliates.


